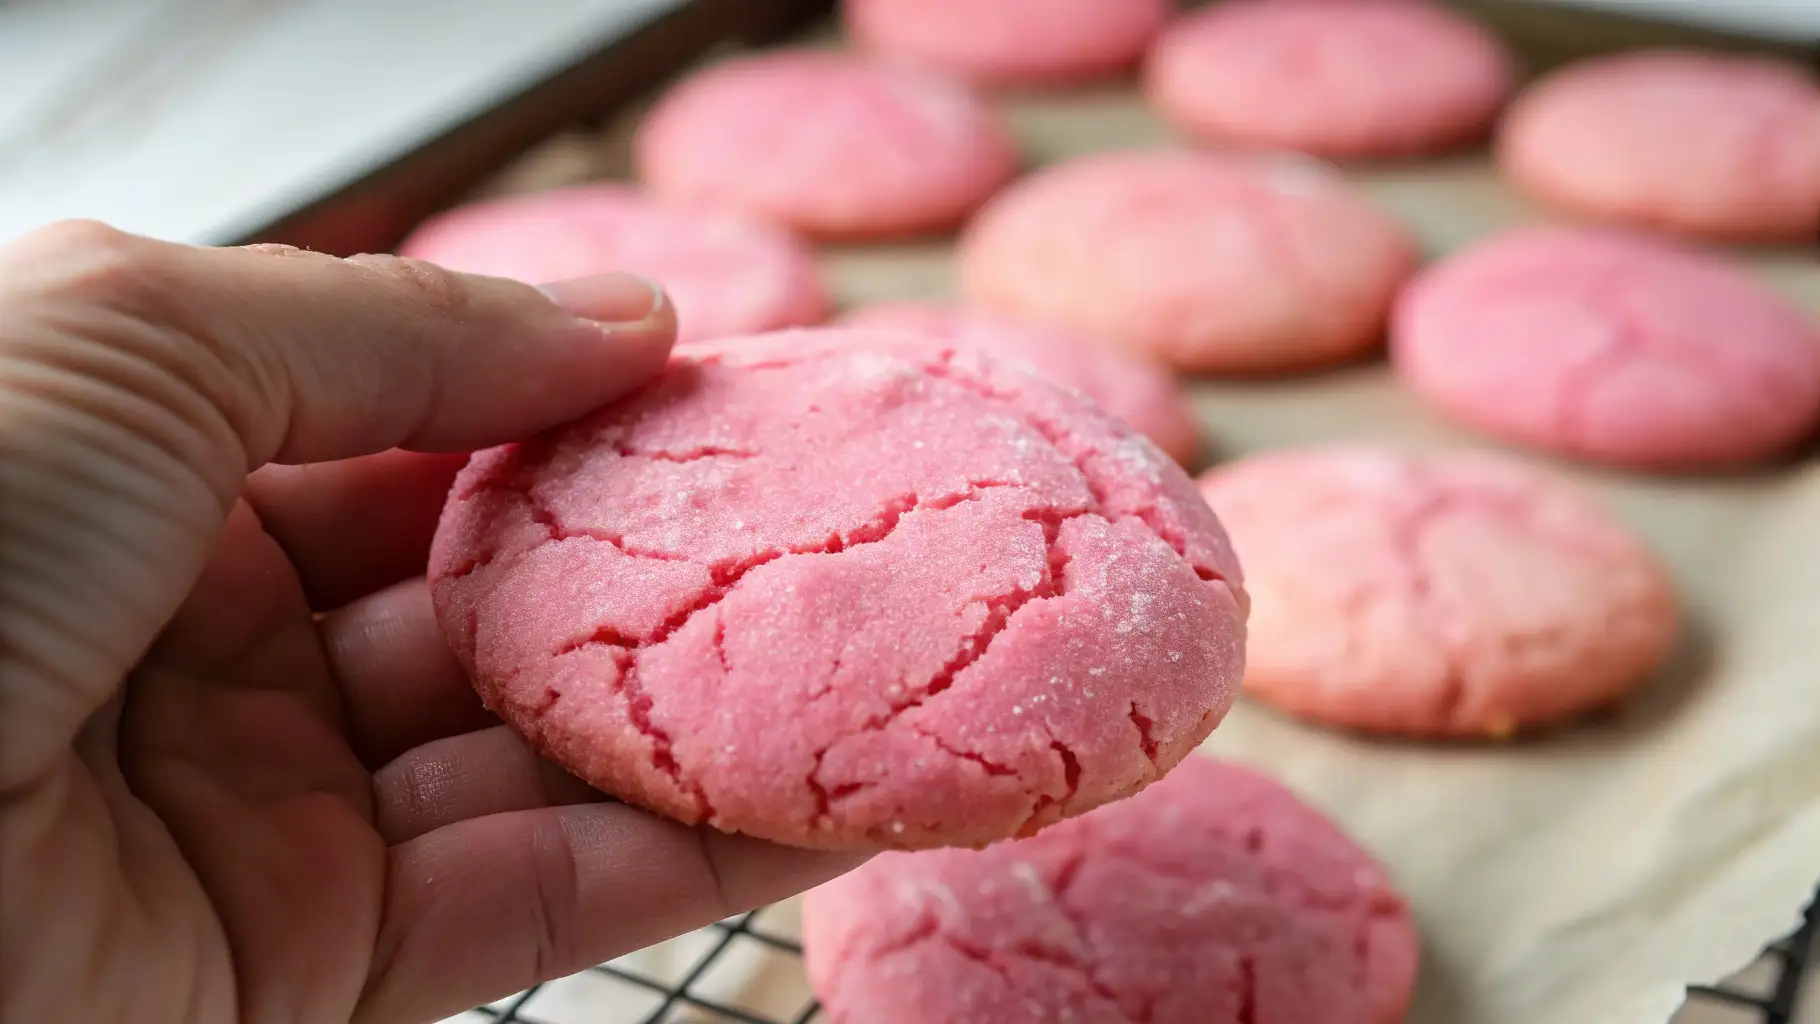
There’s something undeniably charming about the soft, sweet allure of pink cookies. Whether you’re baking for a special occasion, a cozy afternoon treat, or just to add a little color to your day, these irresistible cookies are sure to delight. With their soft texture and vibrant pink hue, they not only taste amazing but also brighten up any kitchen. The best part? They’re simple to make, customizable with your favorite add-ins, and perfect for sharing with loved ones or gifting. Ready to bring some fun into your baking routine? Let’s dive into how to make these delicious, cheerful pink cookies that everyone will adore!
Key Benefits
Pink cookies aren’t just a fun twist on a classic treat; they’re packed with charm and flavor that will have everyone coming back for more. Here’s why you’ll love making these irresistible soft and sweet cookies:
- Soft and Chewy Texture: One of the best things about these pink cookies is their melt-in-your-mouth softness. The texture is perfectly chewy, making them a joy to bite into. They’re tender without being too crumbly, giving you that ideal balance.
- Deliciously Sweet Flavor: These cookies are sweet, but not overly so. The buttery base and vanilla flavor shine through, and the pink color adds a touch of sweetness that’s just enough to satisfy your dessert cravings.
- Simple, Everyday Ingredients: You don’t need to track down any special ingredients for this recipe. Most of the items—like butter, sugar, and flour—are pantry staples, making this an easy treat to whip up whenever the craving strikes.
- Versatility and Fun Customizations: While the base recipe is already delicious, you can easily add your own twist. Want to make them extra festive? Mix in some colorful sprinkles, white chocolate chips, or even a hint of citrus zest. The possibilities are endless, allowing you to make these cookies your own!
- Perfect for Any Occasion: Whether you’re planning a birthday, holiday gathering, or just want a little treat to brighten your day, pink cookies are perfect. Their charming appearance makes them an excellent choice for celebrations, and they’ll definitely stand out on any dessert table.
- Family-Friendly and Kid-Approved: These cookies are not only fun to bake, but also a hit with kids. The soft, sweet flavor and the vibrant pink color make them a great choice for family baking days. Plus, they’re simple enough for little ones to help mix, shape, and decorate!
Making these pink cookies is a delightful, easy, and fun way to bring a little sweetness into your kitchen. So, let’s get started — these cookies are waiting to be enjoyed!
Ingredients
Now that you’re ready to bake, let’s talk about the ingredients you’ll need to create these irresistibly soft and sweet pink cookies. Don’t worry — they’re all simple, easy-to-find ingredients that come together to create a delightful treat. Here’s what you’ll need:
Essential Ingredients:
1 cup unsalted butter, softened – Soft butter is key to achieving that melt-in-your-mouth texture. Be sure to leave it out to soften for about 30 minutes before you start baking.
1 ½ cups granulated sugar – This adds the perfect sweetness to the cookies without being overwhelming. It’s a key part of creating that slightly chewy texture.
2 large eggs – Eggs help bind everything together and contribute to the cookies’ soft consistency.
1 tsp vanilla extract – Vanilla gives the cookies a warm, comforting flavor that enhances the sweetness of the dough.
2 ½ cups all-purpose flour – Flour is your base, giving structure to the cookies. For accurate results, spoon the flour into your measuring cup and level it with a flat edge.
1 tsp baking soda – This is what gives your cookies the perfect rise and helps them stay soft and fluffy.
¼ tsp salt – A little pinch of salt balances the sweetness and enhances the overall flavor.
Pink food coloring – This is what makes these cookies so fun! Add a few drops of pink food coloring to get the vibrant shade you love. Feel free to adjust the amount for a deeper or lighter pink hue.
Optional Add-ins:
½ cup chocolate chips, sprinkles, or white chocolate chunks – These optional ingredients are perfect for those who want to add a bit of extra flavor and texture to their cookies. They also make the cookies even more festive!
Pro Tip:
Food coloring can sometimes get darker while baking, so start with just a few drops and mix well. You can always add more if you want a deeper pink shade! When in doubt, it’s best to begin with a small amount.
With these ingredients, you’re already well on your way to making a batch of soft, sweet pink cookies that are sure to impress. Once you’ve gathered everything, we can move on to the next step: mixing and baking! Ready? Let’s get started!
Instructions
Now that you have your ingredients ready, let’s dive into making these irresistibly soft and sweet pink cookies! Don’t worry, the process is simple and fun, and I’m here to guide you through every step. Let’s get baking!
Step-by-Step Instructions:
Preheat your oven
Start by preheating your oven to 350°F (175°C). This ensures it’s perfectly heated and ready for your cookies when the dough is ready to go.
Cream the butter and sugar
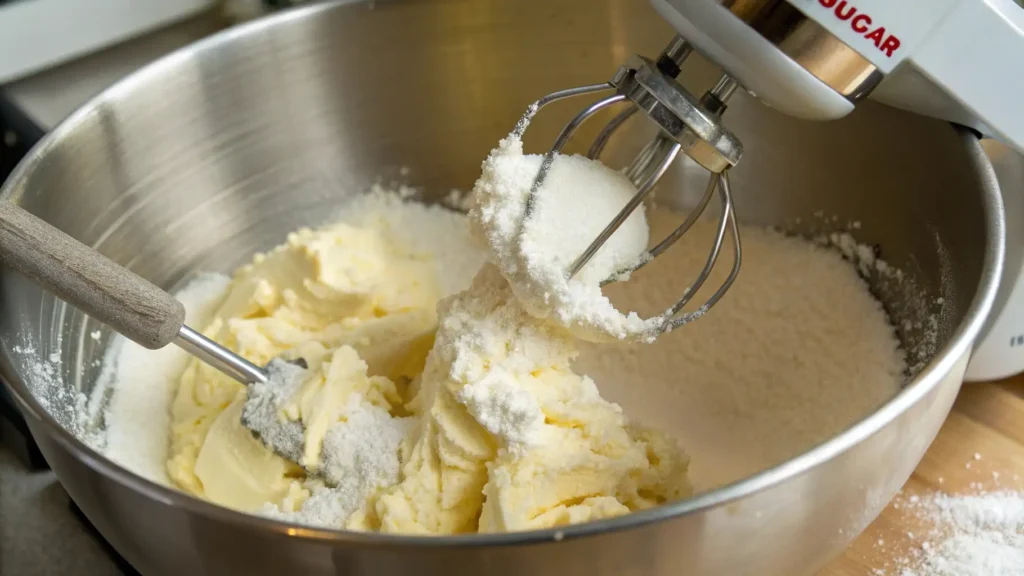
Place the softened butter and granulated sugar into a large mixing bowl. Using an electric mixer or a whisk, beat them together until the mixture is light and fluffy. This process takes about 2-3 minutes and will help create the soft texture you’re after.
Add the eggs and vanilla extract
Add the eggs one at a time, beating thoroughly after each one. Stir in the vanilla extract after mixing in the eggs. It deepens the flavor profile and complements the cookie’s sweetness.
Combine the dry ingredients
In another bowl, mix the flour, baking soda, and salt until well combined. This step ensures the baking soda is evenly distributed, giving your cookies the perfect rise and texture.
Mix the wet and dry ingredients
Gradually add the dry ingredients into the butter mixture, stirring just until everything is combined. Avoid overmixing the dough, as it can make the cookies turn out dense rather than soft.
Add the pink food coloring
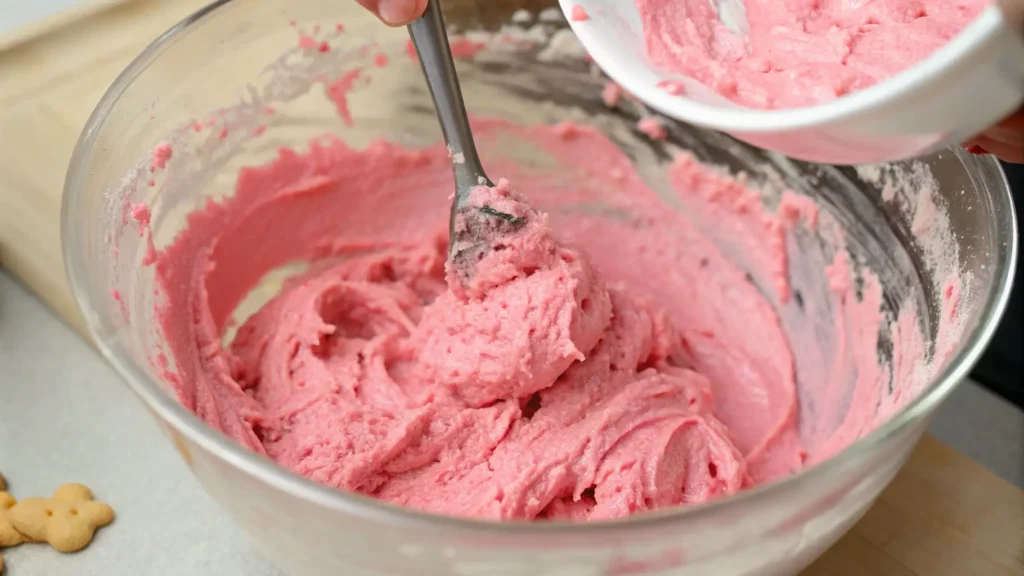
Time to make your cookies pop with color! Mix in the pink food coloring a few drops at a time, blending thoroughly for a uniform hue. Feel free to add more drops if you want a brighter pink hue. This is where the fun begins!
Shape the dough
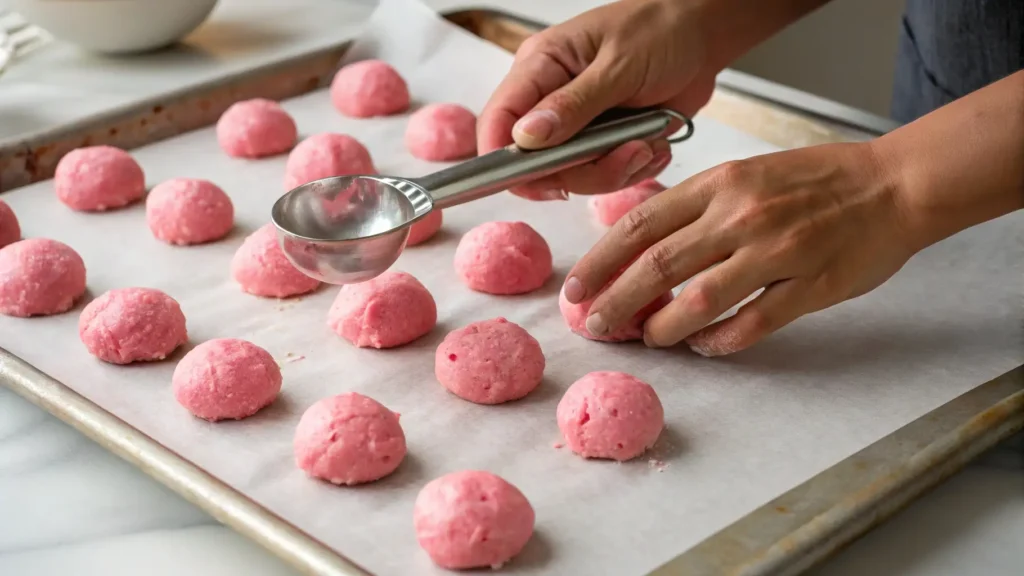
Use a tablespoon or cookie scoop to portion out the dough, rolling each piece into a ball. Arrange them about 2 inches apart on a baking sheet lined with parchment paper. This allows them enough room to spread while baking.
Bake the cookies
Place the baking sheet in your preheated oven and bake for 10-12 minutes. The edges should be lightly golden while the centers remain soft and tender. Keep a close eye on them — you want that perfect chewy texture!
Cool the cookies
Let the cookies sit on the tray for 5 minutes after baking, then transfer them to a wire rack to finish cooling. This helps them firm up just enough to hold their shape while keeping that irresistible soft texture.
Pro Tips:
Don’t overbake: To maintain that chewy texture, be sure to take the cookies out when the edges are just golden. They will continue to cook a bit as they cool.
Chill the dough for thicker cookies: If you like your cookies a little thicker, pop the dough in the fridge for 30 minutes before baking. This also helps reduce spreading.
Customize your cookies: Feel free to add your favorite extras like chocolate chips, sprinkles, or even a hint of lemon zest for an added twist.
Now that you’ve mastered the art of making pink cookies, it’s time to enjoy the fruits of your labor! Soft, sweet, and made for sharing, these cookies are ready to be enjoyed—let’s talk about fun ways to serve them! Happy baking!
Pro Tips and Variations
Looking to elevate your pink cookies even further? Whether you want to tweak the recipe for a personalized touch, explore fun variations, or make your baking experience smoother, here are some pro tips and creative ideas to make your cookies extra special!
Pro Tips for Perfect Pink Cookies:
Measure Your Ingredients Carefully:
Precise measurements are essential for achieving the perfect texture. Spoon and level the flour when measuring to avoid adding too much, which can lead to dense cookies. Always check your sugar-to-butter ratio for that perfect balance of softness and sweetness.
Don’t Overmix the Dough:
Blend the wet and dry ingredients until they come together. Overmixing can lead to cookies that are tough rather than soft. The more gently you handle the dough, the softer your cookies will be!
Use Room Temperature Ingredients:
It’s important to have your butter and eggs at room temperature when you begin. This allows the ingredients to blend more easily, creating a smooth dough that bakes up evenly.
Chill the Dough for Thicker Cookies:
For thicker cookies, refrigerate the dough for 30 minutes before baking. Chilled dough spreads less, resulting in thicker, fluffier cookies. It also helps prevent them from becoming too flat.
Watch the Oven Closely:
The key to perfectly soft and chewy cookies is not overbaking. Start checking them around the 10-minute mark. You want the edges to be golden brown, but the center should still look slightly soft — they’ll firm up as they cool.
Fun Variations to Try:
Chocolate Chip Pink Cookies:
Add a handful of chocolate chips to the dough for a rich, melty contrast against the soft, sweet pink cookies. White chocolate chips also make a delicious addition, enhancing the pink hue beautifully.
Citrus Twist:
For a fresh, zesty variation, stir in lemon zest or orange zest. The citrus flavor balances the sweetness of the cookies and adds a refreshing note, making them perfect for spring or summer.
Almond Pink Cookies:
If you love the warm flavor of almonds, try adding almond extract in place of half the vanilla extract. This adds a nutty depth that beautifully complements the sweet flavor of the cookies.
Sugar Crystal Topping:
For a little extra crunch and sparkle, press a few sugar crystals or sprinkles on top of each cookie before baking. This gives them a fun, decorative finish that’s perfect for parties or celebrations.
Frosted Pink Cookies:
Want to go all out? After baking, top your cookies with a simple buttercream frosting or cream cheese frosting. You can even tint the frosting pink to match your cookies and add a festive, smooth finish.
Make-Ahead Tips:
Freeze the Dough for Later:
For fresh cookies later, shape the dough into balls and freeze them on a baking sheet. Once frozen, transfer the dough balls into a ziplock bag or airtight container. When you’re ready to bake, simply place the dough balls on a sheet and bake straight from the freezer, adding an extra minute or two to the bake time.
Store Your Cookies Properly:
To keep your cookies soft and fresh, store them in an airtight container at room temperature for up to 5 days. For longer freshness, place a slice of bread in the container with your cookies. The bread helps maintain moisture, keeping your cookies soft longer.
With these tips and variations, you can easily make your pink cookies truly your own. Whether you stick to the classic recipe or try something new, these cookies are sure to be a crowd-pleaser every time. Happy baking, and enjoy the delicious results!
Serving Suggestions
Once your pink cookies are baked to perfection, it’s time to enjoy them! These soft, sweet treats are versatile enough to be served in a variety of ways, whether you’re sharing them with friends, family, or just enjoying them solo with a cup of tea. Here are a few serving suggestions to help you get the most out of these delightful cookies.
Serving Ideas:
Perfect for Parties and Gatherings:
Pink cookies make an eye-catching addition to any party or celebration. Whether it’s a birthday, bridal shower, or holiday event, these cookies will steal the spotlight. Arrange them on a decorative platter or tiered cake stand for a fun, festive touch.
Pair with a Warm Beverage:
A warm drink is the perfect companion to these soft cookies. Pair them with a cup of hot tea, coffee, or milk. The rich, buttery flavor of the cookies is a perfect match with a warm beverage, creating a cozy and comforting treat.
Serve with Ice Cream:
Looking to make your cookies even more decadent? Sandwich a scoop of your favorite ice cream between two pink cookies for a colorful and delicious ice cream sandwich. It’s a fun and refreshing treat, especially during the warmer months.
Add to a Dessert Platter:
These cookies are a fantastic choice to add to your dessert spread. Their soft texture and vibrant color make them stand out among other treats. Add them to a platter alongside brownies, cupcakes, and other bite-sized sweets for a show-stopping dessert table.
Giftable Treats:
Pink cookies make wonderful homemade gifts. Package them in a cute box or jar, tied with a colorful ribbon. They’re perfect for giving on holidays, birthdays, or just as a thoughtful gesture to brighten someone’s day. Personalize them by adding a note or decorating with sprinkles to make the gift even more special.
Storage and Serving Tips:
Room Temperature:
Store your cookies in a sealed container at room temperature, where they’ll stay fresh for up to 5 days. If you’re not planning to serve them right away, they’ll stay soft and delicious for several days, making them perfect for pre-planning.
Freezing for Later:
If you’ve made a large batch or want to enjoy these cookies over a longer period, consider freezing them. Once cooled, arrange the cookies in an airtight container or freezer bag, using parchment paper to separate each layer. They’ll stay fresh for up to 3 months, and you can simply thaw them at room temperature when you’re ready to enjoy them.
Serve with Fresh Fruit or Yogurt:
For a lighter dessert, serve these pink cookies alongside fresh berries or a dollop of whipped cream or yogurt. The combination of soft cookies and the freshness of fruit is a simple yet satisfying treat that’s both delicious and beautiful.
With these serving suggestions, your pink cookies can easily become the star of any occasion, whether it’s a casual snack or part of an elaborate dessert spread. Get creative with how you serve them, and you’ll have a fun, colorful treat everyone will love!
Conclusion
And there you have it – your very own batch of irresistibly soft and sweet pink cookies! With their vibrant color and delightful texture, these cookies are sure to become a favorite in your baking repertoire. Whether you’re making them for a special occasion, a cozy treat, or simply to share some joy, they’re the perfect combination of easy, fun, and delicious.
Why You’ll Love These Pink Cookies:
Quick and Easy:
These cookies come together quickly, making them an ideal treat for any day of the week. With simple ingredients and minimal prep time, you’ll have fresh, homemade cookies in no time.
Customizable:
From adding chocolate chips or sprinkles to experimenting with different flavors like citrus or almond, the possibilities are endless. You can personalize the recipe to suit your tastes or the occasion.
Perfect for Sharing:
The cheerful pink hue and soft texture make these cookies perfect for sharing with friends and family. Whether you’re hosting a gathering or just surprising someone with a homemade treat, these cookies will always make a lasting impression.
Fun and Festive:
Baking these pink cookies is a fun, creative activity that anyone can enjoy. Whether you’re baking solo, with kids, or as part of a group, they add a playful touch to your kitchen and can easily be decorated to suit any theme or celebration.
Final Tips:
Store Properly:
Don’t forget to store any leftover cookies in an airtight container to keep them fresh and soft for up to 5 days. If you want to keep them longer, freezing is a fantastic storage option. You can enjoy these pink cookies for weeks to come!
Get Creative with Decorations:
Once you’ve mastered the basic recipe, consider getting creative with decorations. Sprinkle a light dusting of powdered sugar, drizzle some frosting, or add fun sprinkles to top your cookies. They’re your cookies, so feel free to experiment!
Now that you know how to make these deliciously pink, soft cookies, there’s nothing standing between you and your next sweet treat. Whether you’re gifting them, serving them at a celebration, or just enjoying them with a cup of tea, these cookies are bound to bring a smile to anyone’s face. Enjoy the process, and most importantly, enjoy the cookies! Happy baking!
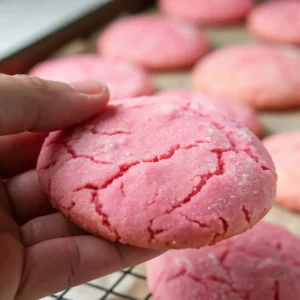
Pink Cookies: How to Make These Irresistibly Soft and Sweet
Ingredients
1 cup unsalted butter, softened – Soft butter is key to achieving that melt-in-your-mouth texture. Be sure to leave it out to soften for about 30 minutes before you start baking.
1 ½ cups granulated sugar – This adds the perfect sweetness to the cookies without being overwhelming. It’s a key part of creating that slightly chewy texture.
2 large eggs – Eggs help bind everything together and contribute to the cookies’ soft consistency.
1 tsp vanilla extract – Vanilla gives the cookies a warm, comforting flavor that enhances the sweetness of the dough.
2 ½ cups all-purpose flour – Flour is your base, giving structure to the cookies. For accurate results, spoon the flour into your measuring cup and level it with a flat edge.
1 tsp baking soda – This is what gives your cookies the perfect rise and helps them stay soft and fluffy.
¼ tsp salt – A little pinch of salt balances the sweetness and enhances the overall flavor.
Pink food coloring – This is what makes these cookies so fun! Add a few drops of pink food coloring to get the vibrant shade you love. Feel free to adjust the amount for a deeper or lighter pink hue.
Instructions
Preheat your oven
- Start by preheating your oven to 350°F (175°C). This ensures it’s perfectly heated and ready for your cookies when the dough is ready to go.
Cream the butter and sugar
- Place the softened butter and granulated sugar into a large mixing bowl. Using an electric mixer or a whisk, beat them together until the mixture is light and fluffy. This process takes about 2-3 minutes and will help create the soft texture you’re after.
Add the eggs and vanilla extract
- Add the eggs one at a time, beating thoroughly after each one. Stir in the vanilla extract after mixing in the eggs. It deepens the flavor profile and complements the cookie’s sweetness.
Combine the dry ingredients
- In another bowl, mix the flour, baking soda, and salt until well combined. This step ensures the baking soda is evenly distributed, giving your cookies the perfect rise and texture.
Mix the wet and dry ingredients
- Gradually add the dry ingredients into the butter mixture, stirring just until everything is combined. Avoid overmixing the dough, as it can make the cookies turn out dense rather than soft.
Add the pink food coloring
- Time to make your cookies pop with color! Mix in the pink food coloring a few drops at a time, blending thoroughly for a uniform hue. Feel free to add more drops if you want a brighter pink hue. This is where the fun begins!
Shape the dough
- Use a tablespoon or cookie scoop to portion out the dough, rolling each piece into a ball. Arrange them about 2 inches apart on a baking sheet lined with parchment paper. This allows them enough room to spread while baking.
Bake the cookies
- Place the baking sheet in your preheated oven and bake for 10-12 minutes. The edges should be lightly golden while the centers remain soft and tender. Keep a close eye on them — you want that perfect chewy texture!
Cool the cookies
- Let the cookies sit on the tray for 5 minutes after baking, then transfer them to a wire rack to finish cooling. This helps them firm up just enough to hold their shape while keeping that irresistible soft texture.
Notes
Nutrition Information (Per Serving – 1 Cookie):
- Calories: 180 kcal
-
Fat: 8g
- Saturated Fat: 5g
-
Carbohydrates: 26g
- Fiber: 1g
- Sugar: 18g
- Protein: 2g
- Cholesterol: 35mg
- Sodium: 100mg
- Potassium: 50mg
- Vitamin A: 4%
- Calcium: 2%
- Iron: 4%
FAQs
I know that sometimes baking can bring up questions, especially when you’re trying a new recipe. Don’t worry, I’ve got you covered with answers to some common questions about making these pink cookies. Here’s everything you need to know to ensure your cookies turn out perfectly every time!
1. Can I use margarine instead of butter?
While unsalted butter is the best option for these pink cookies (because it provides a rich flavor and soft texture), margarine can be used as a substitute. Keep in mind that the cookies may have a slightly different texture, and the flavor might not be as rich. For the best results, I recommend sticking with butter if possible.
2. How can I adjust the color of the cookies?
The pink food coloring you use can affect the final color of your cookies. If you want a deeper, more vibrant pink, just add a few more drops of food coloring. Start with a small amount, mix it in, and gradually add more until you reach your desired shade. Keep in mind that the color might darken slightly while baking, so go a little lighter than you think!
3. Can I freeze the dough?
Yes, absolutely! If you want to make the dough ahead of time, you can freeze it for up to a month. Simply roll the dough into balls, place them on a baking sheet, and freeze. Once they’re firm, transfer them to a ziplock bag or airtight container. When you’re ready to bake, just place the frozen dough balls on a baking sheet and add a couple of extra minutes to the baking time.
4. How do I store my cookies?
To keep your cookies fresh, store them in an airtight container at room temperature for up to 5 days. If you want to keep them soft for longer, add a slice of bread to the container — it helps retain moisture. For longer storage, you can freeze the baked cookies for up to 3 months.
5. Can I add extra ingredients to the dough?
Yes! Feel free to get creative with your pink cookies. You can mix in chocolate chips, sprinkles, or even white chocolate chunks. If you want a citrusy twist, try adding a little lemon or orange zest to the dough. Just be mindful not to overload the dough with add-ins, as too many can affect the texture.
6. Why are my cookies flat?
If your pink cookies turn out flat, there are a couple of common reasons why:
The dough may have been overmixed, which can cause the cookies to spread too much.
Your butter may have been too soft or melted. Always ensure that the butter is softened but not overly soft when mixing.
Lastly, make sure your baking soda is fresh. If it’s expired, it won’t give the cookies the right rise. A quick tip: test your baking soda by adding a little vinegar to it — it should bubble if it’s still good!
7. Can I make the cookies gluten-free?
Yes, you can make these pink cookies gluten-free by swapping the all-purpose flour for a gluten-free flour blend. Be sure to choose a blend that includes xanthan gum or guar gum, which helps provide structure to gluten-free baked goods. The texture may vary slightly, but the flavor will still be just as delicious.

