Have you ever bitten into freshly baked artisan bread and wondered how something so simple could taste so irresistibly delicious? Today, I’m excited to share with you the delightful secrets behind making your very own Batard Bread, a rustic French loaf that promises a perfectly crispy crust and an incredibly chewy texture. Whether you’re new to homemade bread or a seasoned baking enthusiast, this recipe will guide you effortlessly through each step, from selecting the right flour to mastering dough shaping and scoring techniques. Imagine the satisfaction of pulling warm, fragrant batard bread from your oven, ready to slice and serve with your favorite meals. Let’s unlock these irresistible baking secrets together!
Key Benefits of Baking Batard Bread at Home
Making your own batard bread isn’t just about the joy of baking—it’s about creating something truly special from your own kitchen. Here’s why baking this delicious loaf will be an absolute joy:
Authentic Artisan Quality
Experience bakery-quality bread right at home, complete with a beautifully crispy crust and a perfectly chewy texture.
Enjoy the delightful aroma that fills your kitchen, turning baking into a comforting ritual.
Simple, Versatile Ingredients
Uses pantry staples like bread flour, water, yeast, and salt—ingredients that are easy to find and budget-friendly.
Easily personalize your loaf by incorporating herbs, garlic, or cheese to suit your taste.
Easy-to-Follow Steps
Straightforward instructions ensure foolproof baking, guiding you clearly through every stage—from dough proofing and shaping to the art of bread scoring.
No special equipment needed beyond basic kitchen tools you probably already own.
Freshness & Health Benefits
Baking at home means no preservatives or additives, making your batard bread healthier and fresher compared to store-bought varieties.
Control your ingredients fully, perfect for anyone mindful of dietary needs or preferences.
Personalized and Rewarding Experience
Feel the rewarding satisfaction of slicing into warm, freshly baked bread that you’ve crafted yourself.
Impress family and friends by serving homemade bread with your favorite dishes, soups, or as part of memorable gatherings.
Ready to experience the irresistible charm of homemade batard bread? Let’s start baking!
Ingredients for Irresistible Batard Bread
Great bread starts with quality ingredients, and the beauty of baking homemade batard bread lies in its simplicity. Here’s exactly what you’ll need:
Main Ingredients:
Bread Flour (3½ cups / 450g)
Bread flour gives your batard bread that ideal chewy texture and crispy crust. All-purpose flour can be used as a substitute in a pinch, but bread flour produces the best outcome.
Water (1½ cups / 360ml, lukewarm)
Lukewarm water activates the yeast perfectly, enhancing fermentation and ensuring a fluffy, airy loaf.
Active Dry Yeast (1 teaspoon / 3g)
The essential ingredient that helps your dough rise beautifully. Instant yeast is also suitable—simply stir it straight into the flour.
Fine Sea Salt (2 teaspoons / 10g)
Salt enhances flavor and regulates fermentation, giving your bread balanced taste and structure.
Optional Enhancements:
Feel adventurous? Customize your batard bread by including:
Extra Virgin Olive Oil (1 tablespoon) – adds tenderness and richness to the crumb.
Honey or sugar (1 teaspoon) – adds a hint of sweetness that helps activate the yeast.
Herbs and Spices – rosemary, garlic, or even cheese can create incredible flavor variations.
Essential Tools to Have on Hand:
Kitchen scale (for precise measurement)
Dough scraper (makes dough handling easy)
Bread lame or sharp knife (for perfect scoring)
With these ingredients ready to go, you’re set for baking success. Let’s move on and start mixing this simple, delightful dough!
Step-by-Step Instructions for Perfect Batard Bread
Ready to bake your batard bread? Follow these easy, clear steps, and you’ll be amazed by your baking results!
1. Activate the Yeast
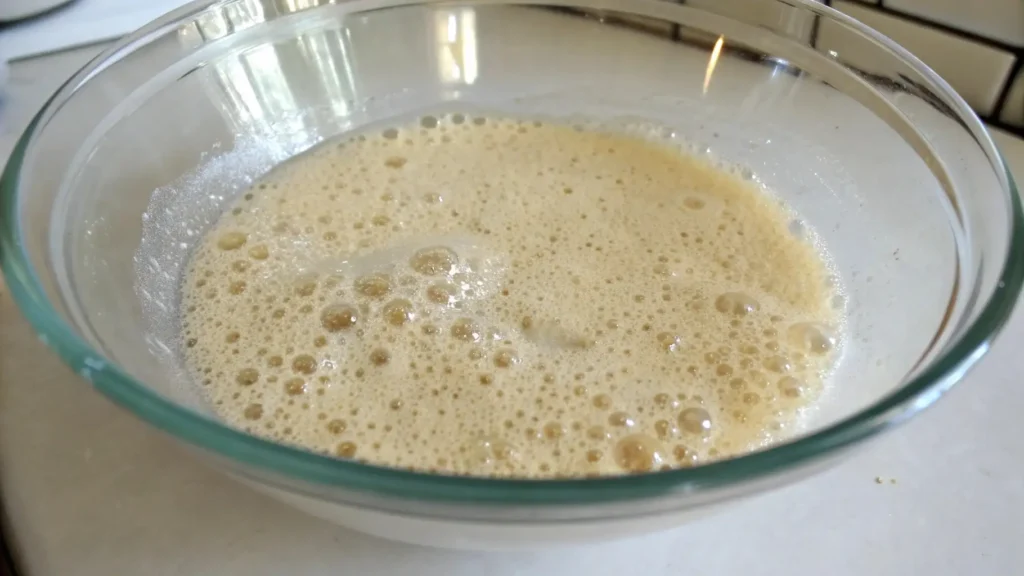
In a bowl, mix lukewarm water and active dry yeast. Stir gently and let sit for about 5-10 minutes until bubbly and fragrant—this means your yeast is active and ready to work its magic!

2. Mix the Dough
In a large mixing bowl, combine bread flour and fine sea salt.
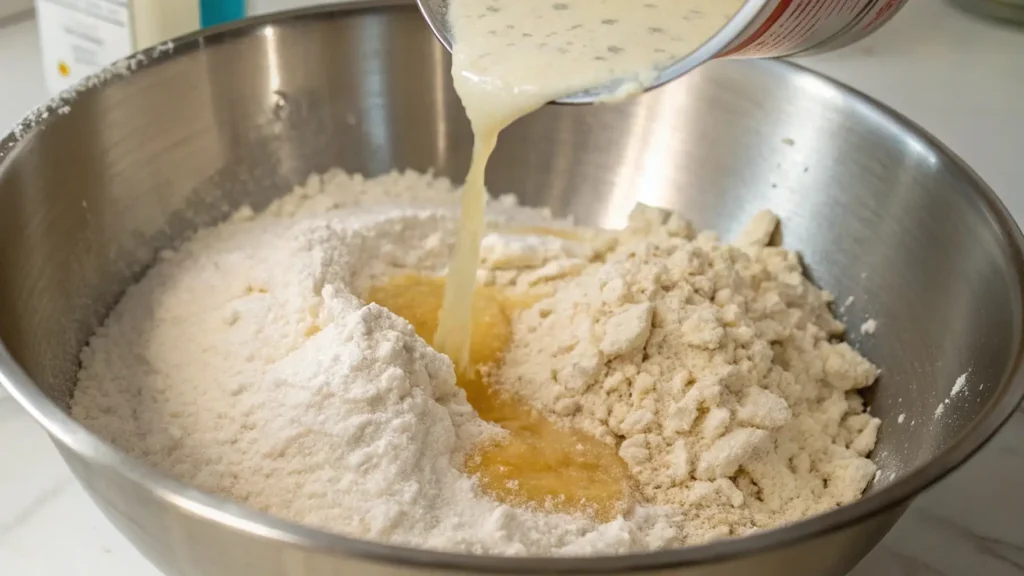
Pour the yeast mixture into the flour. If using olive oil or honey, add now.
Mix thoroughly until a shaggy dough forms.

3. Knead and Proof the Dough
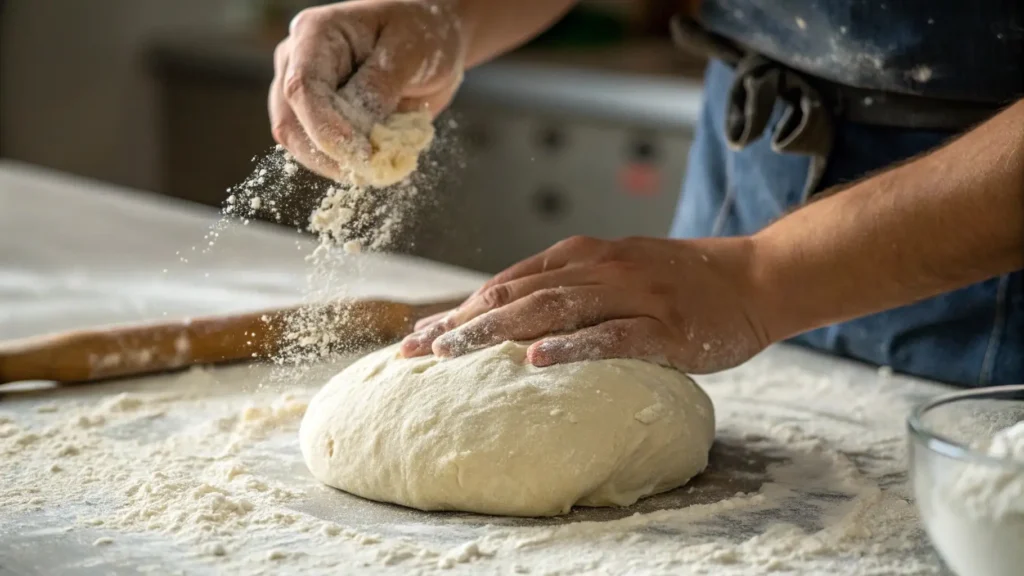
Transfer your dough onto a lightly floured surface. Gently knead by hand for 8-10 minutes, until the dough becomes smooth and elastic. Alternatively, use a stand mixer with a dough hook for 5-7 minutes.
Place the dough in a lightly oiled bowl. Drape a damp kitchen towel or plastic wrap over it.
Let dough proof (rise) in a warm area for 1-2 hours, until doubled in size.

4. Shape the Batard Loaf
Lightly press the dough to release the trapped air.
Form your dough into an oval batard by gently flattening it into a rectangle, folding the sides inward, and rolling it up firmly from one end.
Place your shaped dough seam-side down on parchment paper or in a lightly floured proofing basket (banneton). Cover the dough and allow it to rise again for about 45 minutes to 1 hour, until it becomes puffed.
5. Score and Bake
Preheat your oven to 450°F (230°C). For best results, preheat a baking stone or Dutch oven inside the oven to help achieve that irresistible crispy crust.
Use a bread lame or sharp knife to score your loaf—make confident, shallow cuts about ¼ inch deep, allowing the dough to expand beautifully in the oven.
Carefully transfer your dough (still on parchment paper) onto your preheated baking stone or inside the Dutch oven. Add steam by placing a small tray of water on the bottom oven rack, or by spritzing the oven walls lightly with water.
6. Bake to Perfection
Bake your batard bread for 25 to 30 minutes, until it’s golden brown and has a crunchy crust. The bread should sound hollow when gently tapped on the bottom—that’s your cue it’s perfectly baked!
7. Cool and Enjoy
Transfer your beautifully baked batard loaf onto a wire rack and allow it to cool completely before slicing. Cooling helps the texture fully develop for that ideal crispy-crust-and-chewy-crumb combo.
Having baked your own irresistible homemade batard bread, go ahead and slice into your tasty creation—savor every bite!
Pro Tips and Delicious Variations for Your Batard Bread
Now that you’ve mastered the basics of baking homemade batard bread, here are some pro-level tips and tasty variations to elevate your baking skills even further!
Pro Tips for Perfect Results
Measure with Precision:
Always measure ingredients with a kitchen scale to ensure consistent and reliable results. Small variations can dramatically impact your dough’s texture.
Hydration Adjustment:
For a crispier crust and airy crumb, increase water slightly. If dough feels too wet, gradually add flour a tablespoon at a time.
Temperature Matters:
Dough rises best in a warm environment (70-80°F). Cooler temperatures slow fermentation, while warmer ones speed it up—adjust your proofing times accordingly.
Effective Scoring:
When scoring, hold your bread lame or knife at a slight angle. Firm, swift strokes encourage the dough to expand evenly, creating a lovely oven spring.
Creative and Delicious Variations
Make your batard uniquely yours with these flavorful ideas:
Herb and Garlic Batard:
Mix minced garlic, rosemary, or thyme directly into the dough during mixing, or sprinkle generously before scoring for an aromatic loaf.
Cheesy Crust Variation:
Fold shredded cheese (parmesan, cheddar, or mozzarella) into your dough during shaping. Sprinkle additional cheese on top before baking for a savory golden crust.
Nutty and Fruity Loaf:
Incorporate dried cranberries, raisins, or chopped walnuts into the dough while kneading. Perfect for a sweet twist on your everyday loaf.
Seeded Crust Delight:
After shaping, brush your loaf lightly with water and roll it gently in seeds like sesame, poppy, or sunflower seeds. Adds irresistible texture and nutrition.
Troubleshooting Quick Guide
Dense Bread?
Ensure your yeast is fresh and active. Allow adequate proofing time—rushed dough doesn’t rise well.
Flat Loaf?
Properly shape your loaf and proof adequately. Over-proofing can cause your dough to deflate—watch for the dough to nearly double, but not collapse.
Soft Crust?
Maintain oven temperature and use steam during baking. Remove bread promptly after baking to avoid softening from residual moisture.
With these tips and creative variations, you’ll confidently bake amazing, customized batard bread every single time. Happy baking!
Delicious Serving Suggestions for Your Homemade Batard Bread
Now that you’ve baked your irresistible batard bread, you might be wondering how best to enjoy it. Let me guide you through some delightful ways to serve and savor your fresh loaf:
Simple and Scrumptious Pairings
Butter & Sea Salt:
Nothing beats freshly sliced batard bread slathered with creamy butter and a sprinkle of flaky sea salt. Enjoy this classic simplicity anytime.
Olive Oil & Herbs:
Dip slices into quality extra-virgin olive oil infused with garlic, rosemary, or balsamic vinegar for a quick, flavorful appetizer.
Perfectly Paired Meals
Hearty Soups & Stews:
Your freshly baked bread is perfect alongside comforting soups like creamy tomato basil, rustic minestrone, or hearty beef stew.
Charcuterie Boards:
Serve your sliced batard bread alongside cheeses, cured meats, olives, and honey for an impressive grazing board at gatherings.
Bruschetta & Open-Faced Sandwiches:
Top toasted slices with fresh tomatoes, basil, mozzarella, or your favorite sandwich toppings for easy yet impressive meals.
Serving Temperature Tips
For the best flavor and texture, serve your batard bread slightly warm or at room temperature. To refresh day-old bread, sprinkle it lightly with water and warm it briefly in a preheated oven at 350°F (175°C) for about 5-8 minutes.
Storage and Preservation
Short-Term Storage:
To maintain your bread’s freshness, store it in a paper bag or bread box. Avoid using plastic bags, as they tend to soften the crust and make it chewy.
Freezing for Later:
Before freezing, slice your loaf to conveniently thaw single portions. Wrap the slices securely in plastic wrap and place them in an airtight container or freezer bag, where they can be stored for up to three months.
These versatile serving ideas ensure that every slice of your homemade batard bread brings maximum enjoyment and culinary delight. Happy eating!
Wrapping Up Your Batard Bread Journey
Congratulations, you’ve just embarked on a delightful baking adventure and created your very own delicious homemade batard bread! By mastering these simple yet effective techniques, you now have a bakery-quality loaf that’s fresh, flavorful, and uniquely yours.
Remember, baking great bread is about patience, practice, and enjoying the process. Keep experimenting with flavors, textures, and ingredients, making every loaf better than the last.
Quick Reminders for Perfect Loaves:
Consistency Matters: Precise measurements and proper proofing are key to success.
Embrace Creativity: Explore variations and personalize your bread to your tastes.
Share the Love: Homemade bread makes a wonderful gift—perfect for gatherings or just because.
I hope baking this irresistible batard bread has sparked your enthusiasm to continue exploring the wonderful world of homemade bread. Enjoy every slice, share generously, and keep baking with joy. Happy bread-making!
Explore more Irresistible Bread Recipes you won’t want to Miss:

Batard Bread You’ll Love Irresistible Baking Secrets
Ingredients
Main Ingredients:
- Bread Flour 3½ cups / 450g
- Bread flour gives your batard bread that ideal chewy texture and crispy crust. All-purpose flour can be used as a substitute in a pinch but bread flour produces the best outcome.
- Water 1½ cups / 360ml, lukewarm
- Lukewarm water activates the yeast perfectly enhancing fermentation and ensuring a fluffy, airy loaf.
- Active Dry Yeast 1 teaspoon / 3g
- The essential ingredient that helps your dough rise beautifully. Instant yeast is also suitable—simply stir it straight into the flour.
- Fine Sea Salt 2 teaspoons / 10g
- Salt enhances flavor and regulates fermentation giving your bread balanced taste and structure.
Optional Enhancements:
- Feel adventurous? Customize your batard bread by including:
- Extra Virgin Olive Oil 1 tablespoon – adds tenderness and richness to the crumb.
- Honey or sugar 1 teaspoon – adds a hint of sweetness that helps activate the yeast.
- Herbs and Spices – rosemary garlic, or even cheese can create incredible flavor variations.
Essential Tools to Have on Hand:
- Kitchen scale for precise measurement
- Dough scraper makes dough handling easy
- Bread lame or sharp knife for perfect scoring
Instructions
Activate the Yeast
- In a bowl, mix lukewarm water and active dry yeast. Stir gently and let sit for about 5-10 minutes until bubbly and fragrant—this means your yeast is active and ready to work its magic!
Mix the Dough
- In a large mixing bowl, combine bread flour and fine sea salt.
- Pour the yeast mixture into the flour. If using olive oil or honey, add now.
- Mix thoroughly until a shaggy dough forms.
Knead and Proof the Dough
- Transfer your dough onto a lightly floured surface. Gently knead by hand for 8-10 minutes, until the dough becomes smooth and elastic. Alternatively, use a stand mixer with a dough hook for 5-7 minutes.
- Place the dough in a lightly oiled bowl. Drape a damp kitchen towel or plastic wrap over it.
- Let dough proof (rise) in a warm area for 1-2 hours, until doubled in size.
Shape the Batard Loaf
- Lightly press the dough to release the trapped air.
- Form your dough into an oval batard by gently flattening it into a rectangle, folding the sides inward, and rolling it up firmly from one end.
- Place your shaped dough seam-side down on parchment paper or in a lightly floured proofing basket (banneton). Cover the dough and allow it to rise again for about 45 minutes to 1 hour, until it becomes puffed.
Score and Bake
- Preheat your oven to 450°F (230°C). For best results, preheat a baking stone or Dutch oven inside the oven to help achieve that irresistible crispy crust.
- Use a bread lame or sharp knife to score your loaf—make confident, shallow cuts about ¼ inch deep, allowing the dough to expand beautifully in the oven.
- Carefully transfer your dough (still on parchment paper) onto your preheated baking stone or inside the Dutch oven. Add steam by placing a small tray of water on the bottom oven rack, or by spritzing the oven walls lightly with water.
Bake to Perfection
- Bake your batard bread for 25 to 30 minutes, until it’s golden brown and has a crunchy crust. The bread should sound hollow when gently tapped on the bottom—that’s your cue it’s perfectly baked!
Cool and Enjoy
- Transfer your beautifully baked batard loaf onto a wire rack and allow it to cool completely before slicing. Cooling helps the texture fully develop for that ideal crispy-crust-and-chewy-crumb combo.
Notes
Nutrition Information (per serving):
- Calories: 160
-
Fat: 2g
- Saturated Fat: 0g
- Trans Fat: 0g
-
Carbohydrates: 30g
- Fiber: 1g
- Sugars: 0g
- Protein: 5g
- Sodium: 350mg
- Cholesterol: 0mg

