Have you ever craved the warm, comforting taste of homemade apple pie but didn’t have hours to spare baking? These Apple Pie Biscuits are set to become your new go-to quick dessert! Imagine flaky, golden-brown biscuits stuffed with tender, cinnamon-spiced Granny Smith apples and a hint of rich brown sugar—pure deliciousness in every bite. Perfectly simple and family-friendly, this recipe uses easy-to-find ingredients and takes minimal effort, yet tastes unbelievably good. Whether you’re serving them warm with vanilla ice cream for dessert or enjoying them alongside your morning coffee, these delightful biscuits offer versatility that’ll win everyone’s heart. Let’s get baking!
Key Benefits of Apple Pie Biscuits
If you love the comforting aroma of freshly baked apple pie but need a quicker alternative, you’re going to adore these Apple Pie Biscuits. This recipe combines simplicity and irresistible flavor, making it perfect for both beginner bakers and seasoned home cooks. Here’s why these biscuits deserve a spot in your baking rotation:
Quick and Easy: Made using pre-made biscuit dough, these delightful treats come together in under 30 minutes—ideal for last-minute desserts or spontaneous cravings.
Family-Friendly Flavor: Filled with sweet, tender apples and cozy cinnamon, they capture all the nostalgic warmth of traditional apple pie in a portable, easy-to-enjoy form.
Minimal Ingredients: No need to hunt down fancy ingredients; this recipe calls for everyday kitchen staples like Granny Smith apples, brown sugar, and butter.
Versatile Serving Options: Perfect for breakfast, brunch, or dessert—serve them warm with a scoop of vanilla ice cream or alongside your favorite coffee or tea.
Foolproof Results: Clear, straightforward instructions guarantee delicious outcomes every time, removing the guesswork and stress from baking.
Whether you’re baking with kids on a leisurely weekend or treating yourself after a busy day, these Apple Pie Biscuits deliver comfort, convenience, and incredible taste in every bite. Looking to wow your family and friends with ease? Let’s dive into the ingredients!
Ingredients You’ll Need
Before we dive into baking these irresistible Apple Pie Biscuits, let’s quickly gather all your ingredients. Don’t worry—everything here is simple, affordable, and likely already in your kitchen or easily found at your local grocery store.
Here’s exactly what you’ll need:
1 can refrigerated biscuit dough (8-count)
(Tip: Any brand of flaky, buttery biscuits works wonderfully.)
2 medium Granny Smith apples, peeled, cored, and chopped into small pieces
(Pro tip: Granny Smith apples add a nice tartness, but Honeycrisp or Gala apples work well too!)
¼ cup packed brown sugar
(Light brown sugar is ideal, providing the perfect level of sweetness.)
1 teaspoon ground cinnamon
(This cozy spice really captures the essence of traditional apple pie.)
½ teaspoon vanilla extract
(Just a hint enhances flavor beautifully!)
2 tablespoons unsalted butter, melted
(Unsalted butter allows you to control the overall saltiness of your biscuits.)
Pinch of ground nutmeg (optional)
(Adds a lovely warmth, but feel free to skip if you prefer.)
1 teaspoon fresh lemon juice (optional)
(A squeeze of lemon juice brightens the apples and balances sweetness.)
These straightforward ingredients guarantee bakery-quality results at home, ensuring each biscuit is flaky, flavorful, and deliciously comforting. Once you have everything ready, we’ll move right into creating your tasty biscuits!
Easy Step-by-Step Instructions
Ready to bake your very own batch of mouthwatering Apple Pie Biscuits? Follow these simple instructions, and you’ll have deliciously warm biscuits ready in no time. I’ll guide you through each step, sharing helpful tips to guarantee success!
Step 1: Preheat and Prep
Preheat your oven to 375°F (190°C).
Place parchment paper on a baking tray or apply a thin layer of grease to prevent the biscuits from adhering. This small step makes cleanup much easier!
Step 2: Prepare the Apple Filling
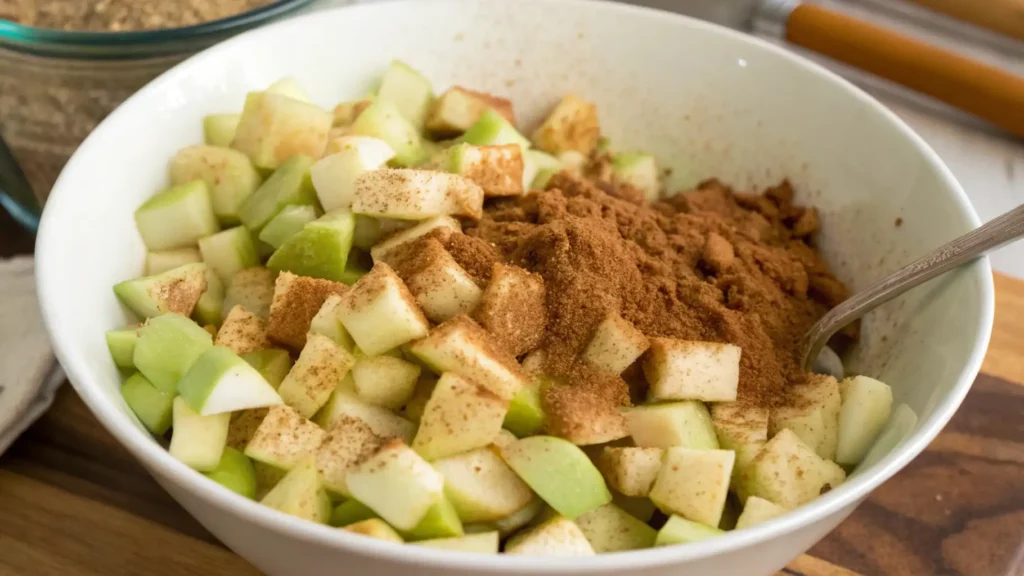
Combine the diced Granny Smith apples, brown sugar, cinnamon, vanilla extract, optional nutmeg, and lemon juice in a bowl and stir well.
Set aside briefly—this allows flavors to meld beautifully while you prepare the biscuits.

Step 3: Shape the Biscuits
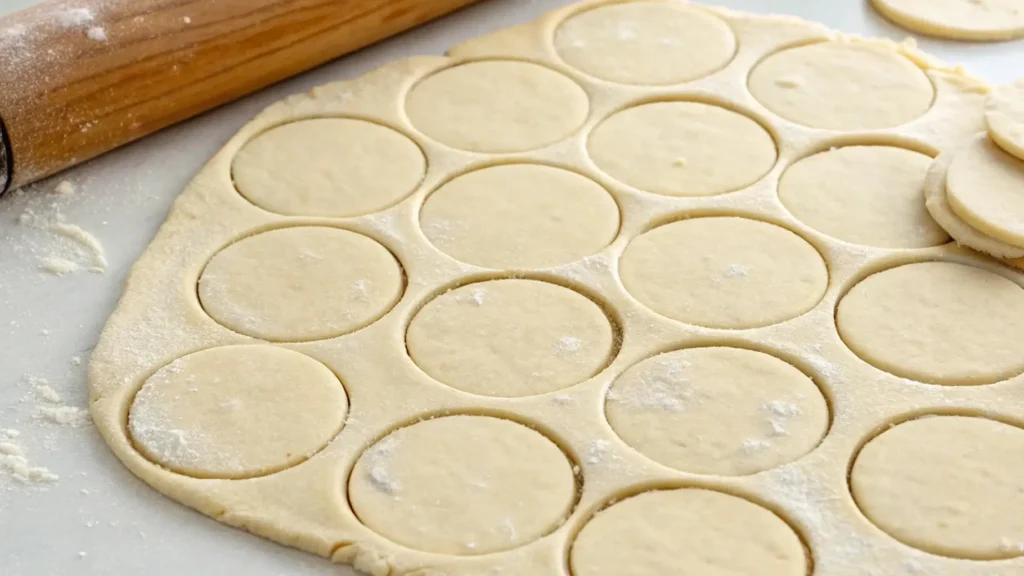
Gently pull apart the refrigerated biscuit dough into single biscuit portions.
Press each biscuit softly with your fingers or a rolling pin to form a circle approximately 4 inches in diameter. Don’t worry about perfect shapes; rustic looks delicious too!

Step 4: Fill and Seal
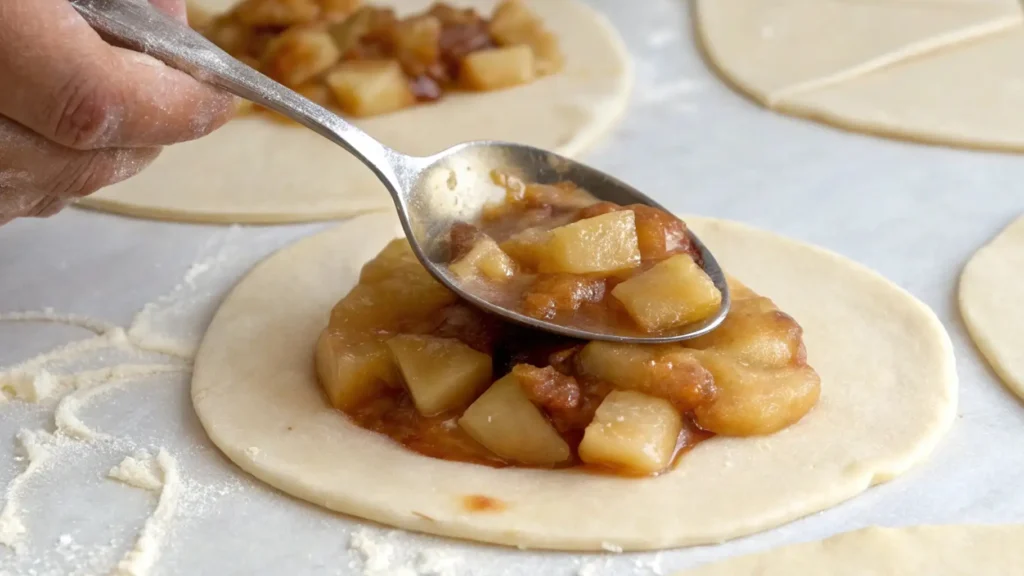
Place roughly 1 tablespoon of the apple filling in the middle of each biscuit circle.
(Tip: Avoid overfilling, so they seal easily and bake evenly.)
Gently fold the dough around the filling, pinching the edges securely to seal, creating a small pouch or turnover shape. Make sure each biscuit is sealed tightly to avoid leaks during baking.

Step 5: Butter and Bake
Lightly coat the tops with melted butter to achieve a beautiful golden-brown color.
Position the biscuits on the prepared pan, keeping a 2-inch distance between each to ensure consistent baking results.
Bake in your preheated oven for 15-18 minutes, or until they turn beautifully golden brown and the aroma fills your kitchen.
Step 6: Cool Slightly and Serve
Once baked, remove from the oven and let cool for about 5 minutes—just enough to handle comfortably.
Enjoy these delightful biscuits warm, perhaps topped with a drizzle of caramel sauce or a scoop of vanilla ice cream for an indulgent dessert!
You’ve successfully created homemade Apple Pie Biscuits—quick, easy, and incredibly tasty. Up next, we’ll cover some fantastic tips and variations to elevate your baking experience even further!
Pro Tips and Delicious Variations
Ready to elevate your Apple Pie Biscuits to the next level? Here are some helpful insider tips and tasty variations that will help you make this easy recipe uniquely yours.
Pro Baking Tips:
Perfectly Tender Apples:
Dice your apples into small, even-sized pieces. This ensures they bake evenly, giving every biscuit that perfect apple-pie texture.
Avoid Soggy Biscuits:
Before spooning the apple mixture onto the dough, make sure to drain off any surplus liquid. This helps maintain flaky biscuits with no unwanted moisture.
Make-Ahead Convenience:
You can prepare the apple filling in advance and refrigerate overnight. This saves you precious time, especially if you plan to bake fresh biscuits in the morning!
Golden-Brown Finish:
To achieve a beautifully golden crust, lightly brush the biscuits with melted butter or an egg wash (a beaten egg mixed with a tablespoon of milk) before baking.
Tasty Variations to Try:
Caramel Apple Pie Biscuits:
Add a drizzle of caramel sauce inside the biscuits before sealing them, or generously pour warm caramel sauce on top after baking—pure indulgence!
Nutty Crunch:
Sprinkle finely chopped pecans or walnuts into your apple mixture for a delightful, nutty texture that complements the soft apple filling perfectly.
Cinnamon Sugar Sprinkle:
Just before baking, dust the tops of the biscuits with a mixture of cinnamon and sugar.
It adds a lovely crunch and boosts that classic apple pie flavor.
Gluten-Free Option:
Swap regular biscuit dough for your favorite gluten-free biscuit dough, available in most grocery stores, to effortlessly accommodate dietary restrictions.
Fruit Variations:
Get creative by mixing apples with pears, berries, or peaches. This versatile recipe adapts beautifully, making it perfect for experimenting with seasonal fruits.
With these practical tips and delightful variations, your homemade Apple Pie Biscuits are guaranteed to impress and satisfy every craving. Let’s move on to serving suggestions to make your baking experience complete!
Serving Suggestions to Delight Your Guests
Now that your warm, flaky Apple Pie Biscuits are fresh from the oven, let’s talk about delicious ways to serve and enjoy them! Whether you’re planning a cozy family breakfast, brunch with friends, or a comforting dessert, these serving suggestions will enhance your baking success.
Delightful Pairings:
Classic Ice Cream Combo:
Serve biscuits warm with a generous scoop of creamy vanilla ice cream. The contrast of hot biscuits and cold ice cream creates an irresistible treat everyone will love.
Drizzle of Caramel or Icing:
Add a touch of sweetness by drizzling caramel sauce, maple syrup, or a simple powdered sugar icing over your biscuits. This adds visual appeal and elevates their flavor beautifully.
Coffee or Tea Companion:
Pair these biscuits with a freshly brewed cup of coffee, cappuccino, or your favorite tea. They’re perfect companions for leisurely mornings or relaxing afternoon breaks.
Creative Presentation Ideas:
Brunch Board:
Arrange biscuits attractively on a platter surrounded by fresh fruits, nuts, cheeses, and jams. It’s an inviting presentation perfect for gatherings or holiday brunches.
Individual Servings:
Serve the biscuits individually in ramekins or on dessert plates, decorated with whipped cream or fresh berries. It’s elegant, easy, and impresses every guest!
Storage & Reheating Tips:
Keep Fresh:
Keep any leftover biscuits in an airtight container at room temperature for up to two days, or place them in the refrigerator to keep them fresh for a longer period.
Easy Reheat:
Reheat biscuits in the oven (350°F/175°C) for about 5–7 minutes or briefly microwave (15–20 seconds) until warmed through. This preserves their flaky texture and flavor.
These serving suggestions ensure that every bite of your homemade Apple Pie Biscuits is memorable and delicious. Next, let’s wrap things up in the conclusion and answer some frequently asked questions to ensure your baking experience is flawless!
Wrapping Up Your Apple Pie Biscuits Adventure
Congratulations! You’ve just baked a batch of delightfully easy and incredibly tasty Apple Pie Biscuits. Whether you’re a novice baker or seasoned pro, I’m confident you’ll appreciate just how simple it was to create something that tastes so amazing. With their flaky crust, warm cinnamon-spiced apples, and that comforting homemade aroma, these biscuits bring all the cozy goodness of traditional apple pie in a fraction of the time.
Remember these quick pointers for best results every time:
Dice apples finely and evenly to ensure perfectly tender filling.
Don’t overfill the biscuits—a tablespoon per biscuit works beautifully.
Experiment with toppings—a caramel drizzle or a scoop of ice cream makes them extra special.
Baking these biscuits isn’t just about great flavors—it’s also about creating memories around your kitchen table. Share them with family, friends, or simply savor them during your own relaxing moments.
Now that you’ve mastered this easy recipe, why not experiment with some delicious variations next time? Happy baking, and don’t forget to share your creations—I’d love to see your version of these delightful Apple Pie Biscuits!

Apple Pie Biscuits: Unbelievably Good & Easy to Make
Ingredients
- 1 can refrigerated biscuit dough 8-count
- Tip: Any brand of flaky, buttery biscuits works wonderfully.
- 2 medium Granny Smith apples peeled, cored, and chopped into small pieces
- Pro tip: Granny Smith apples add a nice tartness, but Honeycrisp or Gala apples work well too!
- ¼ cup packed brown sugar
- Light brown sugar is ideal, providing the perfect level of sweetness.
- 1 teaspoon ground cinnamon
- This cozy spice really captures the essence of traditional apple pie.
- ½ teaspoon vanilla extract
- Just a hint enhances flavor beautifully!
- 2 tablespoons unsalted butter melted
- Unsalted butter allows you to control the overall saltiness of your biscuits.
- Pinch of ground nutmeg optional
- Adds a lovely warmth, but feel free to skip if you prefer.
- 1 teaspoon fresh lemon juice optional
- A squeeze of lemon juice brightens the apples and balances sweetness.
Instructions
Step 1: Preheat and Prep
- Preheat your oven to 375°F (190°C).
- Place parchment paper on a baking tray or apply a thin layer of grease to prevent the biscuits from adhering. This small step makes cleanup much easier!
Step 2: Prepare the Apple Filling
- Combine the diced Granny Smith apples, brown sugar, cinnamon, vanilla extract, optional nutmeg, and lemon juice in a bowl and stir well.
- Set aside briefly—this allows flavors to meld beautifully while you prepare the biscuits.
Step 3: Shape the Biscuits
- Gently pull apart the refrigerated biscuit dough into single biscuit portions.
- Press each biscuit softly with your fingers or a rolling pin to form a circle approximately 4 inches in diameter. Don’t worry about perfect shapes; rustic looks delicious too!
Step 4: Fill and Seal
- Place roughly 1 tablespoon of the apple filling in the middle of each biscuit circle.
- (Tip: Avoid overfilling, so they seal easily and bake evenly.)
- Gently fold the dough around the filling, pinching the edges securely to seal, creating a small pouch or turnover shape. Make sure each biscuit is sealed tightly to avoid leaks during baking.
Step 5: Butter and Bake
- Lightly coat the tops with melted butter to achieve a beautiful golden-brown color.
- Position the biscuits on the prepared pan, keeping a 2-inch distance between each to ensure consistent baking results.
- Bake in your preheated oven for 15-18 minutes, or until they turn beautifully golden brown and the aroma fills your kitchen.
Step 6: Cool Slightly and Serve
- Once baked, remove from the oven and let cool for about 5 minutes—just enough to handle comfortably.
- Enjoy these delightful biscuits warm, perhaps topped with a drizzle of caramel sauce or a scoop of vanilla ice cream for an indulgent dessert!
Notes
Nutrition Information (Per Serving)
- Calories: 220 kcal
- Fat: 9 g
- Carbohydrates: 33 g
- Sugar: 11 g
- Protein: 3 g
- Fiber: 2 g
- Sodium: 410 mg

