Are you ready for a dessert that’s as fun to make as it is to eat? If you’re craving something that combines the irresistible sweetness of fresh strawberries with a rich, gooey cheesecake center, then you’re in for a treat. The Strawberry Earthquake Cake is the perfect indulgence for any occasion, whether it’s a family dinner or a special celebration. The name might be fun, but the taste is even better—imagine layers of soft cake, a tangy cream cheese filling, and an explosion of strawberry goodness in every bite. Simple to prepare but impressive enough to wow your guests, this cake is sure to become a new favorite. Let’s get started and make this sweet sensation together!
Key Benefits of Strawberry Earthquake Cake
When you bake a dessert, you want it to be something special and Strawberry Earthquake Cake is exactly that! Here’s what makes this cake unmissable:
Easy to Make, Yet Impressive: This cake is perfect for both beginner bakers and seasoned pros. With a few simple ingredients, you’ll create a show-stopping dessert that looks like it came straight from a bakery. The surprise cheesecake filling adds a rich, creamy texture that will wow anyone who takes a bite.
Sweet Strawberries Meet Tangy Cheesecake: The blend of ripe berries and creamy, cheesecake-style filling is absolutely irresistible. Each mouthful overflows with vibrant strawberry sweetness beautifully balanced by the rich creaminess of the filling.It achieves an ideal blend of sweet and savory in every mouthful.
Versatile for Any Occasion: Whether you’re hosting a dinner party, celebrating a birthday, or just treating yourself to something sweet, this cake fits any occasion. It’s a fantastic dessert for family gatherings, and its vibrant colors and decadent flavor make it perfect for special celebrations.
Impressively Quick Prep: Don’t be intimidated by the gorgeous, “earthquake”-like cracks in the cake’s surface! While it looks complicated, the recipe is surprisingly easy to follow. It’s a straightforward, no-fuss dessert that comes together in no time, making it perfect for those days when you want to wow your guests with minimal effort.
Make-Ahead Friendly: This cake actually improves with time. The flavors meld together beautifully overnight, making it a great option for making ahead of time. Feel free to bake it a day or two ahead and keep it chilled in the fridge until you’re ready to serve.
Crowd-Pleaser: If you’re looking for a dessert that everyone will enjoy, this is it! The combination of soft cake, creamy filling, and strawberry goodness is universally loved, making it a surefire hit at your next event or family dinner.
With these key benefits, Strawberry Earthquake Cake is more than just a dessert—it’s a delicious experience. Whether you’re serving a crowd or savoring it alone, this cake is sure to leave a lasting impression. Ready to dive in? Let’s get started!
Ingredients for Strawberry Earthquake Cake
To create this Strawberry Earthquake Cake, you won’t need any fancy ingredients—just a handful of staples that work together to create something truly special. Here’s what you’ll need:
For the Cake:
1 box of strawberry cake mix – This is your base, and using a boxed mix keeps things simple while still delivering great flavor. Feel free to choose a high-quality mix for the best results.
1/2 cup butter, melted – This adds richness and helps give the cake a soft, moist texture.
2 large eggs – These are essential for binding the cake ingredients together and providing structure.
1 cup of water – You’ll need this to bring everything together and ensure the cake has the perfect consistency.
For the Cream Cheese Filling:
8 oz cream cheese, softened – This is the heart of your “earthquake” filling, giving it a smooth and creamy texture.
1 cup powdered sugar – This adds sweetness to the filling, making it taste just like a cheesecake!
1 teaspoon vanilla extract – A dash of vanilla enhances the overall flavor of the cake and filling.
Optional Add-ins:
1/2 cup white chocolate chips – These melt beautifully into the cake, adding an extra layer of richness and sweetness.
1 cup fresh strawberries, chopped – Fresh strawberries bring a burst of natural sweetness to the cake and create that strawberry goodness in every bite.
For the Topping (optional):
Powdered sugar – Lightly dust the top for a touch of elegance and added sweetness.
Fresh strawberry slices – For an extra pop of color and flavor, you can top your cake with fresh strawberries before serving.
These ingredients come together to create a dessert that’s simple yet indulgent. The rich cream cheese filling contrasts perfectly with the light strawberry cake, making each bite a delightful experience. If you want to get creative, feel free to tweak the ingredients to your liking—perhaps swapping in some white chocolate or adding a handful of nuts for crunch. Either way, you’ll end up with a dessert that’s bound to impress! Ready to get baking? Let’s move on to the next step!
Instructions for Making Strawberry Earthquake Cake
Making Strawberry Earthquake Cake is easier than it looks! Follow these simple steps to bring this delicious dessert to life.
With just a little patience and everyday ingredients, you’ll end up with a cake that really impresses.
1. Preheat Your Oven
Begin by preheating your oven to 350°F (175°C). This ensures the cake bakes evenly and rises perfectly. Grease a 9×13-inch baking dish with butter or non-stick spray, making sure to cover the bottom and sides to prevent sticking.
2. Prepare the Cake Batter
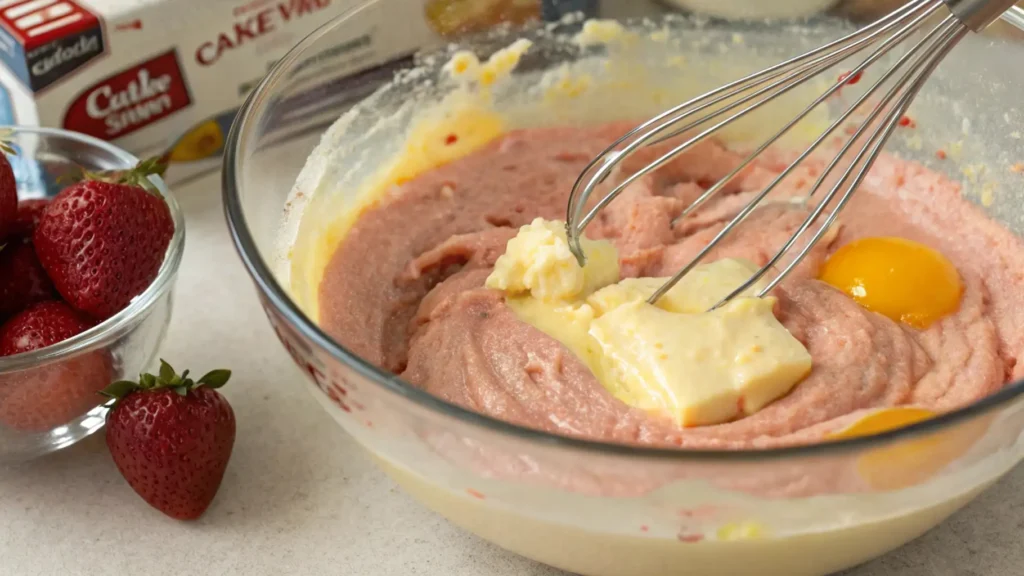
In a large mixing bowl, combine the strawberry cake mix, melted butter, eggs, and 1 cup of water. Stir everything until smooth, ensuring the batter is free of lumps. This is your cake base, and the smoother the batter, the better your final texture will be.
Tip: If you want an extra burst of strawberry flavor, you can toss in a few chopped fresh strawberries directly into the batter. This step is optional but adds a nice fruity touch!

3. Create the Cream Cheese Filling
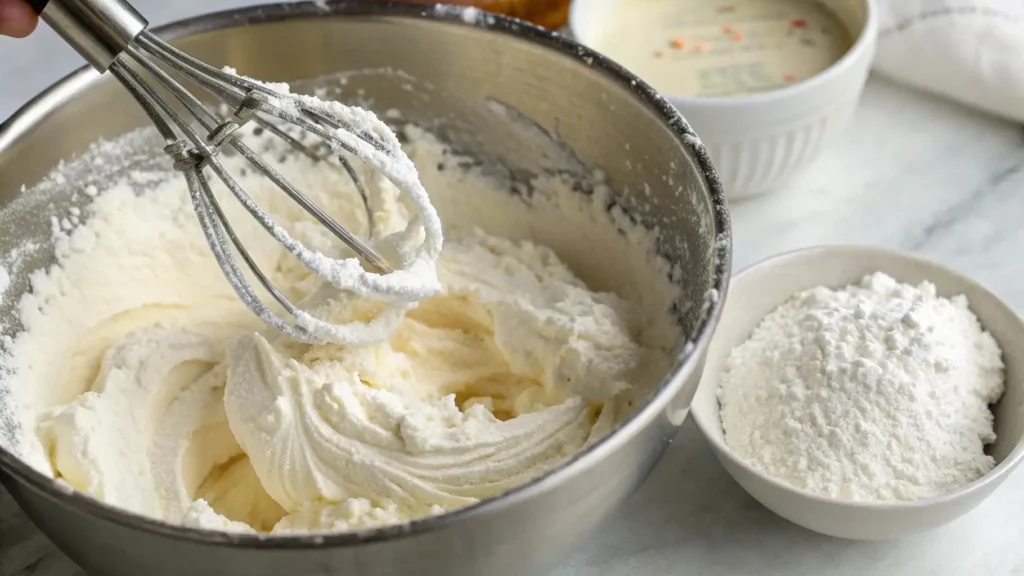
In another bowl, whip the softened cream cheese together with the powdered sugar and vanilla extract. Use a whisk or electric mixer to blend the mixture until it’s smooth and fluffy. You want it to have a creamy, thick consistency that’s easy to spread.
Pro Tip: Make sure the cream cheese is fully softened before you begin mixing. Cold cream cheese can result in lumps, which can affect the smoothness of your filling.

4. Layer the Cake
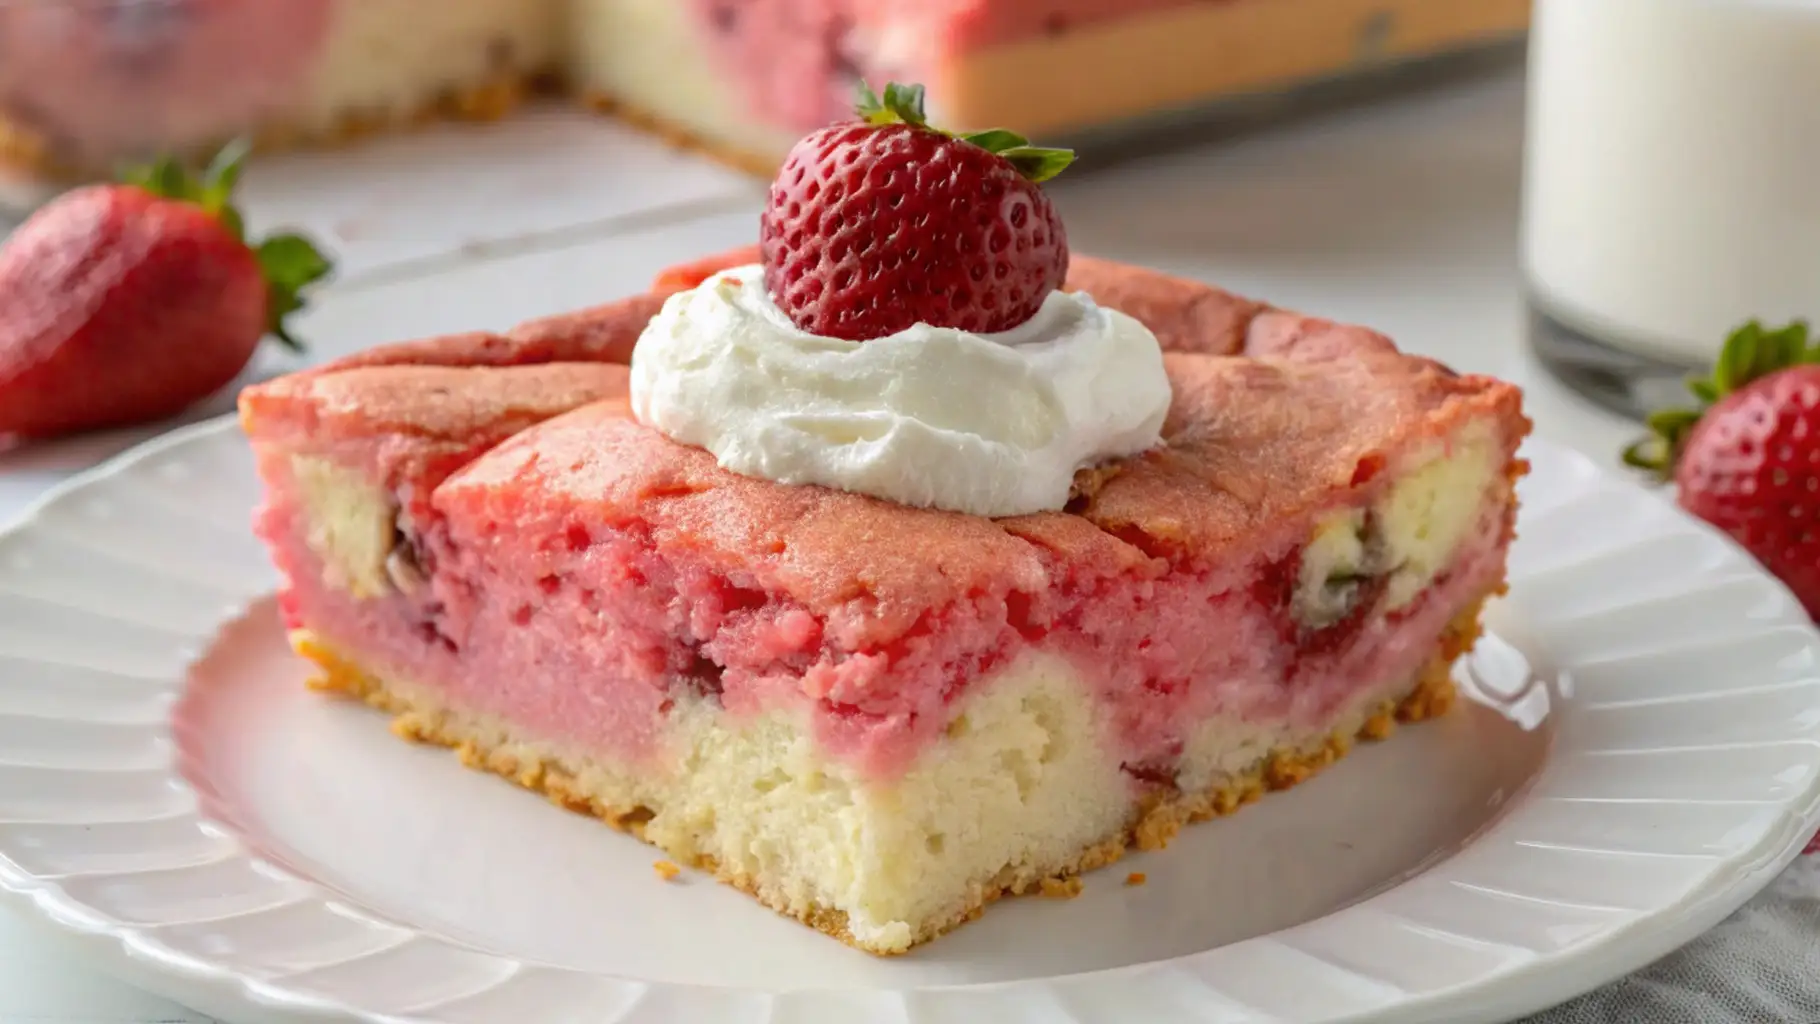
Pour half of the cake batter into the prepared baking dish, spreading it evenly with a spatula. After that, spoon the cream cheese filling in small mounds evenly over the batter. Carefully swirl the filling into the batter with a knife or skewer to achieve a beautiful marbled pattern. Be sure not to over-mix; the goal is to keep some distinct layers for that signature “earthquake” crack look.
Next, pour the remaining cake batter over the top of the cream cheese filling, spreading it out evenly.
5. Bake the Cake
Pop the cake into the preheated oven and bake for 35–40 minutes, or until the surface is golden and a toothpick inserted into the center comes out clean. You’ll notice some cracks forming on top—this is the “earthquake” effect that gives the cake its name.
Tip: If you notice the edges browning too quickly, loosely cover the cake with aluminum foil and continue baking until fully done.
6. Cool and Serve
Once your cake is finished baking, remove it from the oven and allow it to cool in the pan for at least 20-30 minutes. This step is crucial for the cake to set properly and for the flavors to meld together.
Serving Tip: For an added touch, you can sprinkle powdered sugar on top or garnish with fresh strawberry slices before serving.
And just like that, your Strawberry Earthquake Cake is ready to be enjoyed! It’s a dessert that’s sure to become a favorite, with its perfect balance of rich, creamy filling and tender strawberry cake. The steps are straightforward, yet the outcome is absolutely stunning.
Pro Tips and Variations for Strawberry Earthquake Cake
Ready to add your own twist to the Strawberry Earthquake Cake? Whether you’re looking to perfect your technique or experiment with new flavors, here are some pro tips and creative variations to elevate your baking experience!
Pro Tips for Perfect Results
Soften Your Ingredients: For the creamiest filling, make sure the cream cheese and butter are softened to room temperature. Chilled ingredients can lead to lumps in the filling, preventing that silky-smooth texture you’re aiming for. Allow them to come to room temperature for about 30 minutes before you begin.
Don’t Overmix the Batter: When making the cake batter, mix only until the ingredients are just combined. Overmixing can result in a denser cake, and we want it light and airy. Our aim is a light, airy crumb that remains moist and tender.
Perfect Baking Time: Every oven is a bit different, so start checking your cake around the 30-minute mark. Once the surface turns golden with cracks and a toothpick comes out clean when inserted into the center, it’s ready. Be cautious not to overbake—this will keep your cake moist and prevent it from becoming too dry.
Let It Cool: After baking, give your cake time to cool in the pan for 20-30 minutes. This helps it set and ensures it slices cleanly. Plus, it allows the flavors to come together and taste even better!
Delicious Variations to Make It Your Own
Berry Mix: While strawberries are the star, you can mix in other fresh berries like blueberries or raspberries for added depth of flavor. You can toss a handful of berries directly into the batter or swirl them into the filling.
Chocolate Lovers’ Delight: Add some chocolate chips to the batter for an indulgent twist. Dark, milk, or white chocolate will melt beautifully into the cake, creating pockets of gooey sweetness.
Nutty Crunch: For a little extra texture, sprinkle chopped nuts like pecans or walnuts on top of the batter before baking. The crunch complements the tender cake and velvety filling beautifully.
Lemon Zest for Freshness: Brighten up the cake by adding lemon zest to the batter. The vibrant citrus zest balances the sweetness of the strawberries and offers a refreshing contrast to the rich cream cheese filling.
Tropical Twist: If you’re a fan of tropical flavors, add shredded coconut to the batter for a chewy, sweet surprise. It pairs beautifully with the strawberry flavor and gives the cake a delightful texture.
Serving Suggestions to Elevate Your Cake
Whipped Cream: Serve your cake with a dollop of freshly whipped cream. The airy whipped cream balances the decadent, creamy filling and provides a lovely contrast.
Pair with Ice Cream: For the ultimate dessert experience, serve slices of the cake with a scoop of vanilla ice cream or strawberry sorbet. The cold ice cream will melt into the warm cake, creating the perfect bite.
Add a Touch of Elegance: Looking to give your cake a special finishing flair? Top it with fresh strawberry slices or a sprinkle of powdered sugar just before serving. It brings a hint of sophistication and a vibrant pop of color to your dessert.
With these pro tips and variations, you can customize your Strawberry Earthquake Cake to suit your taste and make it truly your own. Whether you stick to the classic version or add your own creative twist, this cake is sure to impress everyone! Enjoy experimenting and, most importantly, enjoy your delicious creation!
Serving Suggestions for Strawberry Earthquake Cake
Now that your Strawberry Earthquake Cake is fresh out of the oven, let’s talk about how to serve it for maximum enjoyment. This cake is already a showstopper, but the right serving touches can make it even more irresistible. Here are some simple yet creative ways to serve your cake and wow your guests!
1. Whipped Cream Topping
A dollop of freshly whipped cream is a classic way to serve this cake. The cream’s light and fluffy texture perfectly offsets the cake’s richness, adding an indulgent feel. To boost the flavor, try stirring in a splash of vanilla extract or a dusting of powdered sugar into the whipped cream.
Pro Tip: If you want to get a little fancy, you can pipe the whipped cream onto each slice using a star tip for a beautiful presentation!
2. Pair with Ice Cream
If you’re looking to really indulge, serve your Strawberry Earthquake Cake with a scoop of vanilla ice cream or strawberry sorbet. The cool, creamy ice cream pairs beautifully with the warm cake, offering a pleasing contrast of temperature and texture. You could also try chocolate ice cream for a richer, more decadent pairing.
Bonus: If you want to add an extra layer of flavor, drizzle some chocolate or caramel sauce over the top before adding the ice cream. It’s an easy way to make your dessert feel even more indulgent!
3. Top with Fresh Fruit
Fresh fruit is an excellent way to brighten up the cake and add a refreshing contrast to the sweetness. Slice some fresh strawberries, blueberries, or even kiwi and scatter them over the top. The vibrant colors will not only look stunning but will also enhance the fruity flavor of the cake.
Creative Twist: You can even macerate the fruit in a little sugar and lemon juice to create a simple syrup that you can drizzle over the cake for added sweetness.
4. Dust with Powdered Sugar
For a simple yet elegant touch, lightly dust the top of the cake with powdered sugar right before serving. This adds a beautiful finish and makes the cake look professionally made without much effort.
Tip: If you want to create a fancier design, you can use a stencil or a mesh strainer to sprinkle the sugar in a pattern over the top of the cake.
5. Serve as a Layered Dessert
Instead of serving the cake as slices, you can turn it into a fun layered dessert! Layer chunks of the cake in individual glasses, and top them with whipped cream, fresh berries, and a drizzle of chocolate sauce. This makes for an elegant dessert parfait that’s perfect for a dinner party or special occasion.
Fun Idea: This is also a great way to make the cake portable—serve them in mason jars for a cute, take-home treat for guests.
6. Coffee or Tea Pairing
Strawberry Earthquake Cake pairs wonderfully with a hot beverage like coffee, espresso, or tea. The richness of the cake complements the bold flavors of the coffee, making it an ideal pairing for brunch or an afternoon snack.
Tip: For a decadent touch, try pairing it with a cappuccino or latte—the creamy froth and slightly bitter coffee will balance the sweetness of the cake perfectly.
With these serving suggestions, you can elevate your Strawberry Earthquake Cake and make every bite feel like a special treat. Whether you prefer it with a scoop of ice cream, a dollop of whipped cream, or topped with fresh fruit, this cake is sure to be a crowd favorite! So go ahead, enjoy, and get creative with your presentations!
Conclusion:
Strawberry Earthquake Cake is a dessert that really makes an impression. Whether you’re a seasoned baker or a first-timer, this cake is simple to make, yet incredibly rewarding. The combination of the tangy, creamy filling and soft, moist strawberry cake makes for a flavor explosion that’s both indulgent and satisfying.
It’s the kind of cake that’s perfect for any occasion—whether you’re hosting a gathering, celebrating a birthday, or just treating yourself to something sweet. Not only does it look stunning, but it’s also versatile enough to be personalized with your favorite add-ins, like nuts, chocolate chips, or extra berries.
What really makes this cake special is its ability to bring everyone together. Its light yet rich flavor, paired with the fun “earthquake” cracks on top, creates a dessert experience that’s both delicious and memorable. And with the helpful pro tips and serving suggestions, you’ll be able to take it to the next level each time you bake it.
So, go ahead—make your own Strawberry Earthquake Cake and see for yourself how a few simple ingredients can come together to create something truly spectacular. It’s a dessert that’s bound to become a favorite in your kitchen and one that will leave everyone coming back for more. Enjoy every bite!

Strawberry Earthquake Cake A Sweet Sensation You’ll Love
Ingredients
For the Cake:
- 1 box of strawberry cake mix – This is your base and using a boxed mix keeps things simple while still delivering great flavor. Feel free to choose a high-quality mix for the best results.
- 1/2 cup butter melted – This adds richness and helps give the cake a soft, moist texture.
- 2 large eggs – These are essential for binding the cake ingredients together and providing structure.
- 1 cup of water – You’ll need this to bring everything together and ensure the cake has the perfect consistency.
For the Cream Cheese Filling:
- 8 oz cream cheese softened – This is the heart of your “earthquake” filling, giving it a smooth and creamy texture.
- 1 cup powdered sugar – This adds sweetness to the filling making it taste just like a cheesecake!
- 1 teaspoon vanilla extract – A dash of vanilla enhances the overall flavor of the cake and filling.
Optional Add-ins:
- 1/2 cup white chocolate chips – These melt beautifully into the cake adding an extra layer of richness and sweetness.
- 1 cup fresh strawberries chopped – Fresh strawberries bring a burst of natural sweetness to the cake and create that strawberry goodness in every bite.
For the Topping (optional):
- Powdered sugar – Lightly dust the top for a touch of elegance and added sweetness.
- Fresh strawberry slices – For an extra pop of color and flavor you can top your cake with fresh strawberries before serving.
Instructions
Preheat Your Oven
- Begin by preheating your oven to 350°F (175°C). This ensures the cake bakes evenly and rises perfectly. Grease a 9×13-inch baking dish with butter or non-stick spray, making sure to cover the bottom and sides to prevent sticking.
Prepare the Cake Batter
- In a large mixing bowl, combine the strawberry cake mix, melted butter, eggs, and 1 cup of water. Stir everything until smooth, ensuring the batter is free of lumps. This is your cake base, and the smoother the batter, the better your final texture will be.
- Tip: If you want an extra burst of strawberry flavor, you can toss in a few chopped fresh strawberries directly into the batter. This step is optional but adds a nice fruity touch!
Create the Cream Cheese Filling
- In another bowl, whip the softened cream cheese together with the powdered sugar and vanilla extract. Use a whisk or electric mixer to blend the mixture until it’s smooth and fluffy. You want it to have a creamy, thick consistency that’s easy to spread.
- Pro Tip: Make sure the cream cheese is fully softened before you begin mixing. Cold cream cheese can result in lumps, which can affect the smoothness of your filling.
Layer the Cake
- Pour half of the cake batter into the prepared baking dish, spreading it evenly with a spatula. After that, spoon the cream cheese filling in small mounds evenly over the batter. Carefully swirl the filling into the batter with a knife or skewer to achieve a beautiful marbled pattern. Be sure not to over-mix; the goal is to keep some distinct layers for that signature “earthquake” crack look.
- Next, pour the remaining cake batter over the top of the cream cheese filling, spreading it out evenly.
Bake the Cake
- Pop the cake into the preheated oven and bake for 35–40 minutes, or until the surface is golden and a toothpick inserted into the center comes out clean. You’ll notice some cracks forming on top—this is the “earthquake” effect that gives the cake its name.
- Tip: If you notice the edges browning too quickly, loosely cover the cake with aluminum foil and continue baking until fully done.
Cool and Serve
- Once your cake is finished baking, remove it from the oven and allow it to cool in the pan for at least 20-30 minutes. This step is crucial for the cake to set properly and for the flavors to meld together.
- Serving Tip: For an added touch, you can sprinkle powdered sugar on top or garnish with fresh strawberry slices before serving.
Notes
Nutrition Information (per serving)
- Calories: 375
- Fat: 22g
- Saturated Fat: 11g
- Cholesterol: 60mg
- Sodium: 240mg
- Carbohydrates: 45g
- Fiber: 1g
- Sugar: 32g
- Protein: 4g
- Vitamin A: 8%
- Vitamin C: 10%
- Calcium: 4%
- Iron: 6%

