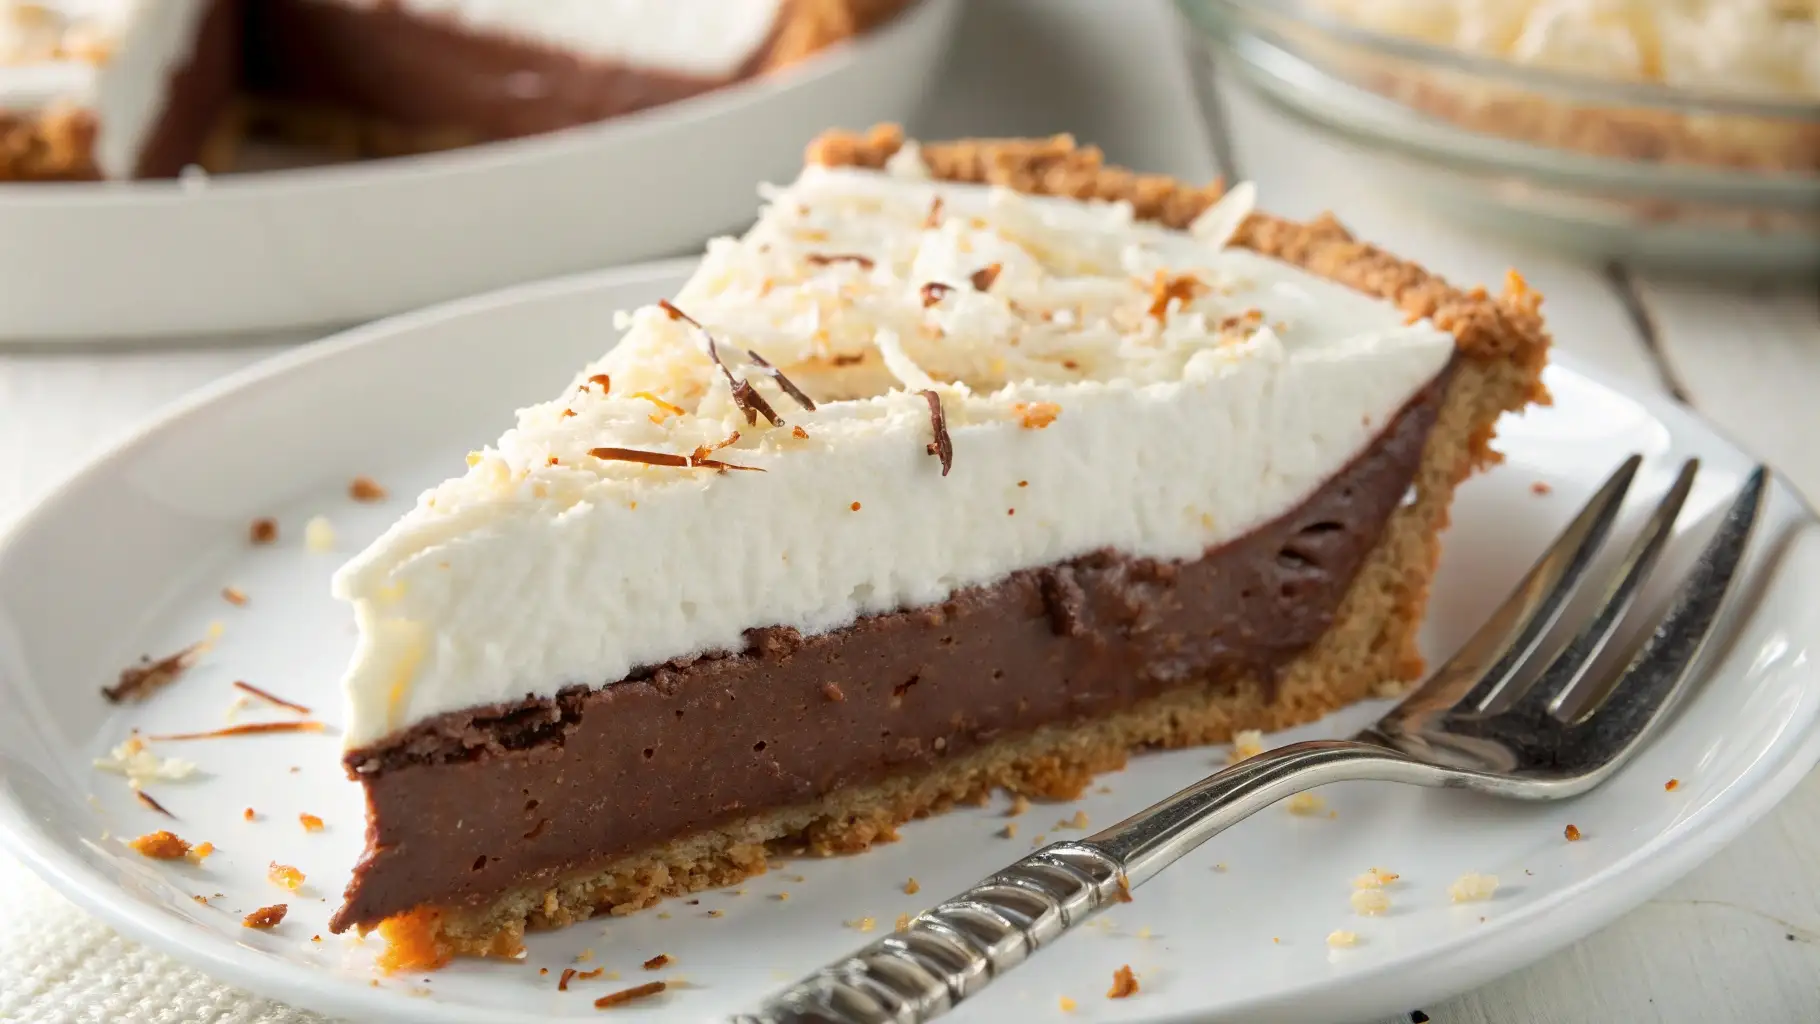
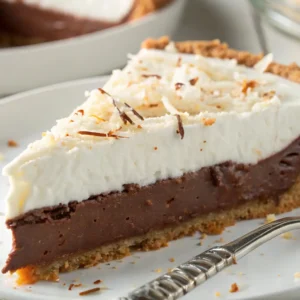
Chocolate Haupia Pie is the kind of dessert that feels like a warm hug with every bite. If you’ve never tried it before, you’re in for a treat—literally! This Hawaiian-inspired pie combines two irresistible flavors: the rich, velvety smoothness of chocolate and the tropical, creamy goodness of coconut. It’s the perfect dessert to impress guests or to indulge in after a long day.
What makes this pie truly special is its versatility. Whether you’re looking for a decadent dessert for a special occasion or simply craving something sweet, Chocolate Haupia Pie fits the bill. You can even customize it with a gluten-free crust or vegan-friendly ingredients to suit your dietary needs. Ready to make the best dessert you’ll ever taste?
Key Benefits of Chocolate Haupia Pie
Chocolate Haupia Pie isn’t just another dessert—it’s a showstopper that combines rich chocolate and creamy coconut in a way that will leave you craving more. Here’s why you should make it:
1. Decadent Yet Light
This pie strikes the perfect balance between decadence and lightness. The coconut milk filling is luxuriously smooth but won’t weigh you down. With its rich chocolate layer and coconut base, every bite feels like an indulgence without being overly heavy. It’s the best of both worlds—a sweet treat that’s satisfying yet refreshing.
2. Versatile for Any Occasion
From casual family gatherings to elegant dinner parties, Chocolate Haupia Pie is versatile enough for any event. The tropical flavors bring a unique twist to traditional pies, making it perfect for special occasions like birthdays, holidays, or summer BBQs. Plus, its visually stunning layers make it an ideal centerpiece for your dessert table.
3. Customizable to Your Dietary Needs
One of the great things about Chocolate Haupia Pie is how easy it is to customize. Want a gluten-free version? Simply swap in a gluten-free pie crust. Looking for a dairy-free option? Use coconut cream and vegan chocolate. This dessert can fit various dietary preferences without compromising on taste. It’s a win-win for everyone at the table!
4. Simple and No-Bake
You don’t need to be a seasoned baker to make this pie. The best part? It’s mostly a no-bake recipe. Simply prepare the coconut filling, layer it with rich chocolate, and let it set in the fridge. The hands-on time is minimal, making it a perfect option for busy days when you want something impressive without spending hours in the kitchen.
5. A Tropical Flavor Explosion
The combination of chocolate and coconut is nothing short of magical. If you love tropical desserts, this pie will transport you straight to paradise. The coconut milk filling gives a creamy, dreamy texture, while the chocolate layer adds richness, creating a perfect balance of flavors that feels like a vacation in every bite.
With these benefits, it’s clear that Chocolate Haupia Pie is a dessert that does it all—easy to make, incredibly versatile, and absolutely delicious. Ready to make this tropical masterpiece? Let’s dive into the ingredients and get started!
Ingredients for Chocolate Haupia Pie
Before we dive into the fun part—assembling this delicious dessert—let’s gather our ingredients! Don’t worry, it’s a simple list, and most of these items are pantry staples. Here’s everything you’ll need to make the ultimate Chocolate Haupia Pie:
For the Pie Crust:
- 1 pre-made graham cracker crust (or homemade, if you prefer a fresh touch)
- 3 tbsp melted butter (this helps to give the crust that perfect, buttery texture)
For the Coconut Haupia Filling:
- 1 can (13.5 oz) coconut milk (this is your secret ingredient for a creamy, tropical flavor)
- 1 can (13.5 oz) coconut cream (adds extra richness and gives that velvety texture)
- 1/2 cup sugar (to perfectly sweeten the filling)
- 1/4 cup cornstarch (to thicken the filling and give it that smooth consistency)
- 1/4 tsp salt (balances the sweetness)
- 1 tsp vanilla extract (enhances the overall flavor with a subtle warmth)
For the Chocolate Layer:
- 1 cup semi-sweet chocolate chips (or chopped chocolate if you prefer a more robust flavor)
- 1/2 cup heavy cream (for the ultimate silky smooth chocolate ganache)
Optional Garnishes:
- Whipped cream (for a luxurious topping)
- Shredded coconut (adds a bit of crunch and enhances the tropical vibe)
- Chocolate shavings (because who doesn’t love a little extra chocolate on top?)
Pro Tips for Choosing Ingredients:
- Coconut milk vs. coconut cream: Coconut cream is thicker and richer than coconut milk. Using both in this recipe ensures your filling has that luxurious, creamy texture. If you can’t find coconut cream, you can substitute with more coconut milk, but the filling may be a bit lighter.
- Pie crust choices: The graham cracker crust is classic, but feel free to switch things up. For a gluten-free option, look for a gluten-free graham cracker crust, or even consider a chocolate cookie crust for an added flavor twist.
- Quality chocolate: The chocolate layer is a key element in this recipe, so use a high-quality semi-sweet chocolate for the best results. If you’re a dark chocolate lover, try using dark chocolate chips or a chocolate bar—your taste buds will thank you!
With these ingredients on hand, you’re ready to create something special. Let’s move on to the next step and get started with preparing this mouthwatering pie!
Instructions for Making Chocolate Haupia Pie
Let’s get started with putting this Chocolate Haupia Pie together! I promise, it’s easier than it looks and totally worth the effort. Just follow these simple steps, and you’ll have a dessert everyone will rave about!
1. Prepare the Pie Crust:
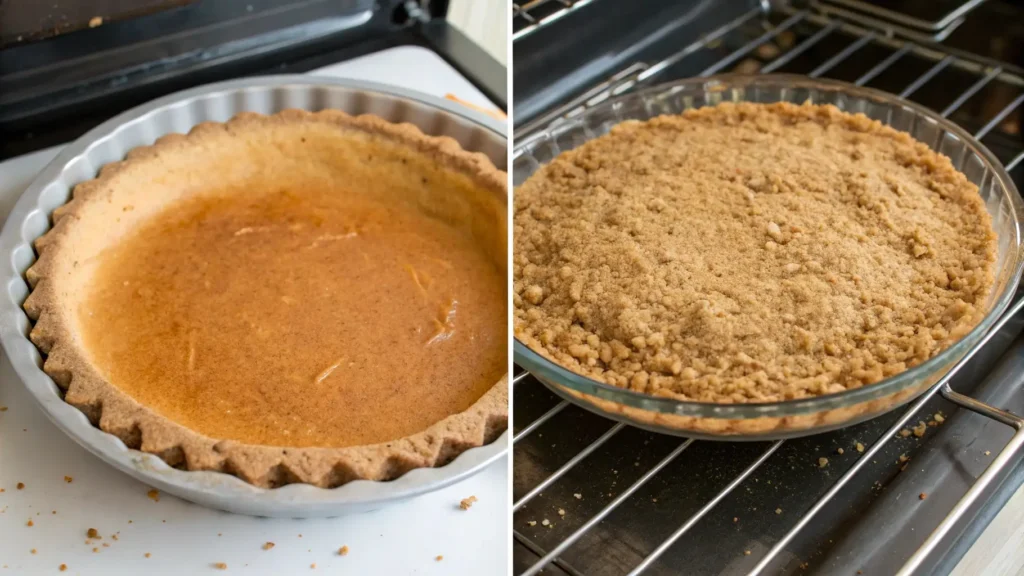
If you’re using a pre-made graham cracker crust, simply set it aside and get ready for the filling. If you’re feeling extra and making your own, mix the melted butter with the crushed graham crackers. Press the mixture into a pie dish and bake at 350°F (175°C) for about 10 minutes. Allow it to cool fully before continuing with the next step.
2. Make the Coconut Haupia Filling:
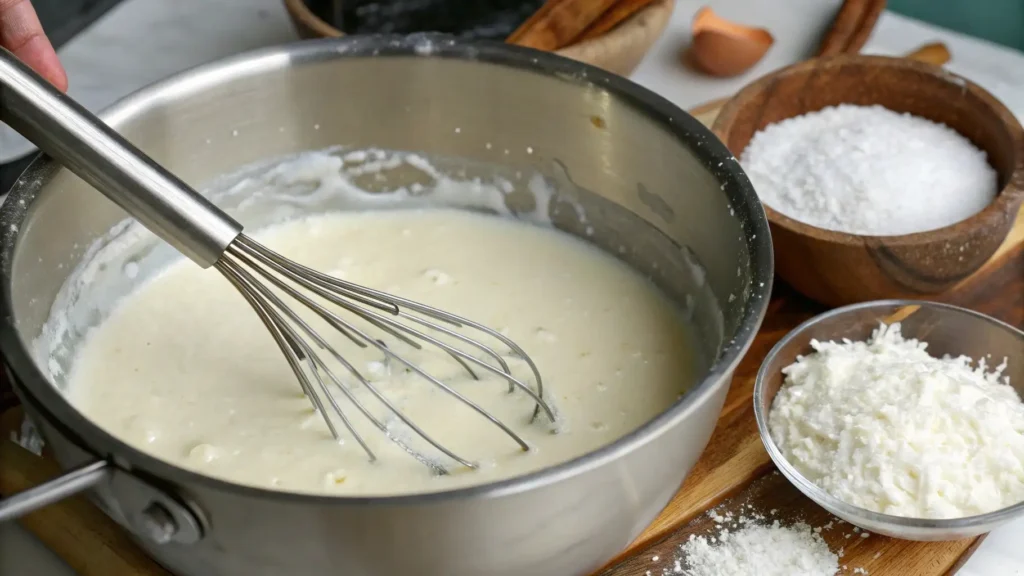
Combine the coconut milk, coconut cream, sugar, cornstarch, and a pinch of salt in a medium saucepan and whisk until smooth. Stir well to make sure the cornstarch is dissolved evenly and there are no lumps.
Set the saucepan over medium heat and stir continuously until the mixture starts to thicken, about 5 to 7 minutes. It should reach a smooth, custard-like consistency. Keep an eye on it and continue stirring to prevent it from sticking.
Once thickened, remove the pan from the heat and stir in the vanilla extract for a beautiful depth of flavor. Set it aside to cool slightly.
3. Prepare the Chocolate Ganache Layer:
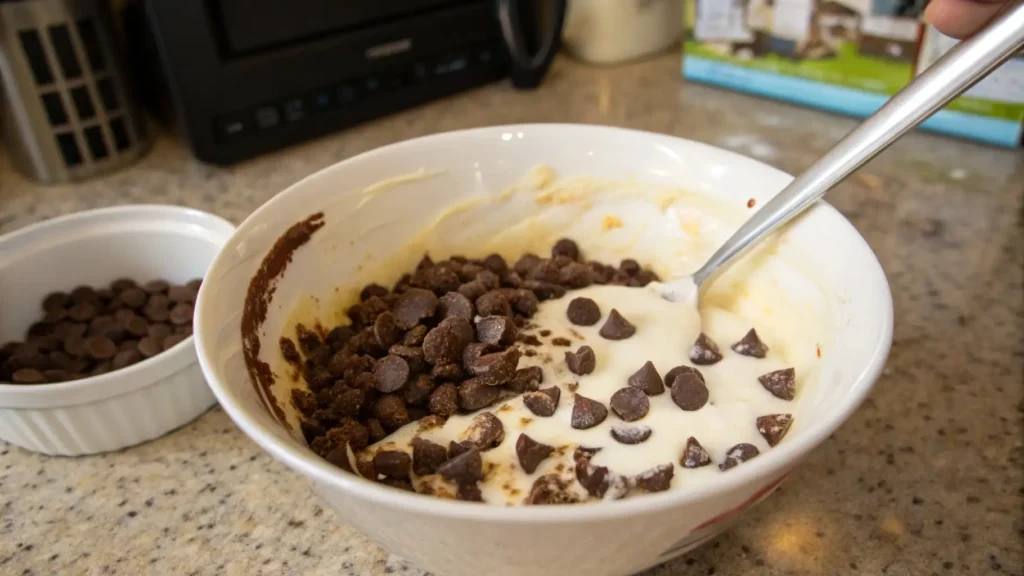
While the coconut filling is cooling, let’s move on to the chocolate layer. In a heatproof bowl, combine the semi-sweet chocolate chips and heavy cream. Microwave the bowl in 20-second bursts, stirring each time until the chocolate is fully melted and smooth.
Once your ganache is ready, pour a thin layer over the cooled graham cracker crust. Spread it evenly across the base using a spoon or spatula. Let this layer set while you work on the next step.
4. Assemble the Layers:
Once the chocolate layer has cooled and firmed up, it’s time to add the coconut haupia filling. Gently pour the coconut mixture over the chocolate layer, smoothing it out with a spatula. Avoid mixing into the chocolate layer to preserve clean, defined layers.
Chill the pie in the fridge for at least 4 hours, or preferably overnight, to allow the filling to set perfectly. This is crucial to getting that creamy, firm texture everyone will love.
5. Garnish and Serve:
After the pie has set, it’s time to get creative with the toppings! Add a dollop of whipped cream, a sprinkle of shredded coconut, and chocolate shavings for that extra touch of decadence. You can even top it with fresh tropical fruit like mango or pineapple for a refreshing burst of flavor.
Pro Tips:
Layering Tips: For the cleanest layers, make sure each layer has fully set before adding the next one. This helps maintain distinct layers without blending the flavors.
Chilling Time: The longer the pie sits in the fridge, the better it will set and the more the flavors will meld together. If you can, let it rest overnight for the best texture and taste.
Making Ahead: This pie is great for prepping ahead of time. Make it the day before your gathering or meal and let it chill overnight. It will taste even better after a little time to set!
Whether you’re hosting or just craving something sweet, your pie is ready to shine. Relish the decadent taste of this luscious, tropical delight!
Pro Tips and Variations for Chocolate Haupia Pie
Now that you’ve mastered the basics of Chocolate Haupia Pie, let’s take it up a notch with some pro tips and creative variations. Whether you want to tweak the flavors, make it more accommodating for different diets, or just get a little fancy, these tips are here to help you make the perfect pie every time.
1. Experiment with Different Crusts:
While the classic graham cracker crust is delicious, don’t be afraid to switch things up! Try using a chocolate cookie crust for an extra layer of flavor or a gluten-free graham cracker crust if you’re catering to dietary restrictions. For an even more tropical twist, consider using crushed shortbread cookies or a coconut-based crust.
2. Vegan-Friendly Options:
To make this pie completely vegan, simply substitute the heavy cream with coconut cream and use vegan chocolate. For the crust, you can opt for a store-bought vegan graham cracker crust or make your own. This ensures that everyone can enjoy this tropical treat without compromising on flavor or texture!
3. Add a Hint of Coffee or Liqueur:
If you’re a fan of deep, rich flavors, add a dash of espresso powder to the chocolate ganache to bring out a mocha flavor. Alternatively, for a more adult twist, you could stir in a splash of Kahlúa or Baileys Irish Cream into the chocolate layer or coconut filling. It’s a great way to enhance the dessert’s richness!
4. Top with Fresh Fruit:
Bring a burst of freshness to your pie by topping it with sliced tropical fruits like mango, pineapple, or kiwi. The sweetness of the fruit pairs beautifully with the rich, creamy layers of the pie, offering a bright contrast and adding a pop of color. For a more decadent touch, drizzle a bit of chocolate syrup over the top.
5. Make Mini Pies for Individual Servings:
Want to make your pie a bit more fun or easier to serve? Consider making mini Chocolate Haupia Pies instead of one large pie. Just grab a muffin tin or mini tart pans to create single-serve versions. The layers will set just as beautifully in smaller portions, and they’re perfect for parties or gatherings where guests will love having their own little serving.
6. Get Creative with Layering:
Want to add even more texture and flavor? Try incorporating a layer of fresh whipped cream or a coconut whipped cream between the chocolate and coconut layers. You can also add crushed toasted coconut flakes on top for a satisfying crunch and even more coconut flavor.
Pro Tip for the Perfect Texture:
To ensure the smoothest coconut filling, make sure you whisk it continuously while it’s heating up. This prevents any lumps from forming and helps you achieve that silky, custard-like consistency that makes this pie so irresistible.
By trying out these variations and tips, you can easily make this Chocolate Haupia Pie uniquely yours. Whether you go for a rich, decadent twist or opt for a lighter, vegan version, the possibilities are endless. Don’t be afraid to get inventive—make this pie a true reflection of your style!
Serving Suggestions for Chocolate Haupia Pie
Now that your Chocolate Haupia Pie is ready to shine, let’s talk about how to serve it for maximum enjoyment. This pie already stands out, but with a few thoughtful additions, it can become a truly unforgettable dessert. Here are some ideas to make your serving presentation as delicious as it is beautiful.
1. Garnish with Whipped Cream:
A dollop of freshly whipped cream can add a light, fluffy contrast to the rich coconut and chocolate layers. For an extra special touch, you can pipe the whipped cream into elegant rosettes around the edges or in the center of each slice. It brings both delicious flavor and an elegant appearance.
2. Sprinkle with Toasted Coconut:
For a delightful crunch and a hint of extra coconut flavor, top the pie with toasted coconut flakes. Place the coconut in a dry pan and toast over medium heat for a few minutes until lightly browned. The toasted coconut will add a savory contrast to the creamy filling and make your pie look even more inviting.
3. Pair with Fresh Tropical Fruit:
Bring the tropical theme to life by adding some fresh fruit on the side or on top of each slice. Sliced mango, pineapple, or kiwi are excellent choices that bring a fresh burst of flavor and a beautiful pop of color. The sweetness and tartness of the fruit complement the rich, creamy filling perfectly.
4. Drizzle with Chocolate Syrup:
For all the chocolate lovers out there, a drizzle of chocolate syrup or chocolate ganache can make the pie even more indulgent. You can either drizzle it over the top or create a decorative pattern around the edges of each slice. It’s an easy way to add a little more flair to your dessert presentation.
5. Serve with Ice Cream or Sorbet:
If you want to make this dessert even more irresistible, serve each slice with a scoop of vanilla ice cream or coconut sorbet. The cold, creamy texture of the ice cream or sorbet pairs beautifully with the rich, chilled pie. For a refreshing twist, coconut sorbet adds a great tropical flavor that complements the pie’s coconut filling.
6. Make Individual Portions:
If you’re serving a crowd, consider making individual mini pies or pie jars. These are perfect for portion control and make for a cute presentation at a party or gathering. You can serve them with similar garnishes, but each person gets their own personal slice of paradise!
7. Serve Chilled for Maximum Enjoyment:
For the best experience, always serve Chocolate Haupia Pie chilled. This dessert shines when it’s cold and firm, allowing the flavors to meld together perfectly. Make sure to store any leftovers in the fridge and enjoy them over the next few days (though they rarely last that long!).
Final Thoughts:
Serving Chocolate Haupia Pie is all about making it as delightful to the eyes as it is to the taste buds. Whether you go for simple whipped cream or get creative with fruit and syrup, these serving suggestions will add the finishing touches to your delicious pie. Ready to enjoy? Grab a fork, and let the flavors of chocolate and coconut take you to dessert heaven!
Conclusion: Why You’ll Love Chocolate Haupia Pie
Chocolate Haupia Pie is more than just a dessert—it’s a true crowd-pleaser that combines the richness of chocolate with the smooth, creamy tropical flavors of coconut. Whether you’re making it for a special occasion, a dinner party, or simply as a sweet treat for yourself, this pie is sure to impress.
1. A Perfect Balance of Flavors:
The chocolate ganache layer provides a deep, indulgent richness, while the coconut filling adds a silky, tropical creaminess. Together, these flavors blend seamlessly, making every bite feel like a little slice of paradise.
2. Versatile and Customizable:
One of the best things about this pie is how adaptable it is. Whether you need a gluten-free version, want to make it vegan, or simply want to add a personal twist, this recipe is easy to customize. You can experiment with different crusts, fillings, or toppings to make it your own.
3. Perfect for Any Occasion:
From casual family dinners to elegant gatherings, this pie is versatile enough to suit any occasion. Its beautiful layers and vibrant flavors make it a stunning centerpiece for dessert tables, while the creamy texture ensures it’s a treat everyone will love.
4. Easy to Make, Impressive to Serve:
Despite its showstopper appearance, Chocolate Haupia Pie is surprisingly simple to prepare. With just a few basic ingredients and minimal hands-on time, you’ll have a dessert that looks and tastes like you spent hours in the kitchen—perfect for both experienced bakers and beginners.
5. Make Ahead for Convenience:
Chocolate Haupia Pie is a fantastic dessert to make ahead of time. In fact, it’s even better after a day or two in the fridge, allowing the flavors to develop and the filling to set perfectly. It’s a great option when you’re hosting a gathering or looking to prepare dessert in advance.
Final Thoughts:
Chocolate Haupia Pie is the kind of dessert that never fails to impress. This dessert is luxuriously creamy and rich, bursting with tropical charm and a perfect harmony of chocolate and coconut. Whether you’re serving it at a special event or treating yourself on a quiet evening, this pie is sure to become a favorite. Don’t hesitate to experiment with variations or toppings to make it your own—this pie is all about enjoying the process and savoring the final result.
So, what are you waiting for? Get everything ready and savor the magic of Chocolate Haupia Pie—pure dessert bliss awaits!
Chocolate Haupia Pie The Best Dessert You’ll Ever Taste
Ingredients
For the Pie Crust:
- 1 pre-made graham cracker crust or homemade, if you prefer a fresh touch
- 3 tbsp melted butter this helps to give the crust that perfect, buttery texture
For the Coconut Haupia Filling:
- 1 can 13.5 oz coconut milk (this is your secret ingredient for a creamy, tropical flavor)
- 1 can 13.5 oz coconut cream (adds extra richness and gives that velvety texture)
- 1/2 cup sugar to perfectly sweeten the filling
- 1/4 cup cornstarch to thicken the filling and give it that smooth consistency
- 1/4 tsp salt balances the sweetness
- 1 tsp vanilla extract enhances the overall flavor with a subtle warmth
For the Chocolate Layer:
- 1 cup semi-sweet chocolate chips or chopped chocolate if you prefer a more robust flavor
- 1/2 cup heavy cream for the ultimate silky smooth chocolate ganache
Optional Garnishes:
- Whipped cream for a luxurious topping
- Shredded coconut adds a bit of crunch and enhances the tropical vibe
- Chocolate shavings because who doesn’t love a little extra chocolate on top?
Instructions
Prepare the Pie Crust:
- If you’re using a pre-made graham cracker crust, simply set it aside and get ready for the filling. If you’re feeling extra and making your own, mix the melted butter with the crushed graham crackers. Press the mixture into a pie dish and bake at 350°F (175°C) for about 10 minutes. Allow it to cool fully before continuing with the next step.
Make the Coconut Haupia Filling:
- Combine the coconut milk, coconut cream, sugar, cornstarch, and a pinch of salt in a medium saucepan and whisk until smooth. Stir well to make sure the cornstarch is dissolved evenly and there are no lumps.
- Set the saucepan over medium heat and stir continuously until the mixture starts to thicken, about 5 to 7 minutes. It should reach a smooth, custard-like consistency. Keep an eye on it and continue stirring to prevent it from sticking.
- Once thickened, remove the pan from the heat and stir in the vanilla extract for a beautiful depth of flavor. Set it aside to cool slightly.
Prepare the Chocolate Ganache Layer:
- While the coconut filling is cooling, let’s move on to the chocolate layer. In a heatproof bowl, combine the semi-sweet chocolate chips and heavy cream. Microwave the bowl in 20-second bursts, stirring each time until the chocolate is fully melted and smooth.
- Once your ganache is ready, pour a thin layer over the cooled graham cracker crust. Spread it evenly across the base using a spoon or spatula. Let this layer set while you work on the next step.
Assemble the Layers:
- Once the chocolate layer has cooled and firmed up, it’s time to add the coconut haupia filling. Gently pour the coconut mixture over the chocolate layer, smoothing it out with a spatula. Avoid mixing into the chocolate layer to preserve clean, defined layers.
- Chill the pie in the fridge for at least 4 hours, or preferably overnight, to allow the filling to set perfectly. This is crucial to getting that creamy, firm texture everyone will love.
Garnish and Serve:
- After the pie has set, it’s time to get creative with the toppings! Add a dollop of whipped cream, a sprinkle of shredded coconut, and chocolate shavings for that extra touch of decadence. You can even top it with fresh tropical fruit like mango or pineapple for a refreshing burst of flavor.
Notes
Nutrition Information (per serving)
- Calories: 375
-
Fat: 24g
- Saturated Fat: 18g
- Protein: 3g
-
Carbs: 42g
- Fiber: 2g
- Sugar: 29g
- Cholesterol: 25mg
- Sodium: 90mg
- Potassium: 220mg
- Calcium: 10% of Daily Value
- Iron: 8% of Daily Value
FAQs
After making this delicious pie, there are always a few common questions that arise. Here are some answers to help you get the most out of your Chocolate Haupia Pie and ensure that every slice turns out perfectly.
1. How do I store Chocolate Haupia Pie?
To keep your Chocolate Haupia Pie fresh, simply cover it with plastic wrap or store it in an airtight container in the fridge. The pie should be chilled for at least 4 hours before serving, and leftovers will last for up to 3 days in the refrigerator. Be sure to keep it cold so the filling stays firm and creamy!
2. Can I make Chocolate Haupia Pie ahead of time?
Yes! This pie is perfect for making ahead. In fact, it’s even better the next day, as the flavors have time to meld together. Simply prepare it the day before your gathering and refrigerate overnight. The filling sets beautifully, and you don’t have to worry about last-minute prep when it’s time to serve.
3. Can I freeze Chocolate Haupia Pie?
While you can freeze the pie, the texture of the coconut filling might change slightly once thawed. If you need to freeze it, wrap the pie tightly in plastic wrap or foil and place it in a freezer-safe container. To serve, allow the pie to thaw overnight in the fridge, but note that the texture may be a bit softer than when freshly made.
4. Can I use a different crust for this pie?
Absolutely! If you’d like to change things up, feel free to swap out the graham cracker crust for a different option. A chocolate cookie crust adds an extra layer of flavor, and you can also go for a gluten-free crust if needed. Just make sure the crust is pre-baked and completely cooled before adding the filling.
5. How can I make Chocolate Haupia Pie vegan or dairy-free?
You can easily make this pie vegan and dairy-free by swapping a few ingredients:
-Use coconut cream and coconut milk instead of regular dairy products.
-Replace the heavy cream in the chocolate layer with coconut cream or a dairy-free alternative.
-Ensure your chocolate chips are vegan by checking the label.
6. What’s the best way to serve Chocolate Haupia Pie?
For the best experience, serve the pie chilled. You can garnish it with whipped cream, a sprinkle of toasted coconut, or some fresh tropical fruit like mango or pineapple. Each bite of this pie is a tropical escape, and a beautiful garnish makes it even more tempting.
7. How long does Chocolate Haupia Pie last in the fridge?
Chocolate Haupia Pie stays fresh in the fridge for up to 3 days. After that, the texture and flavor might start to change slightly, so it’s best to enjoy it within a few days.

