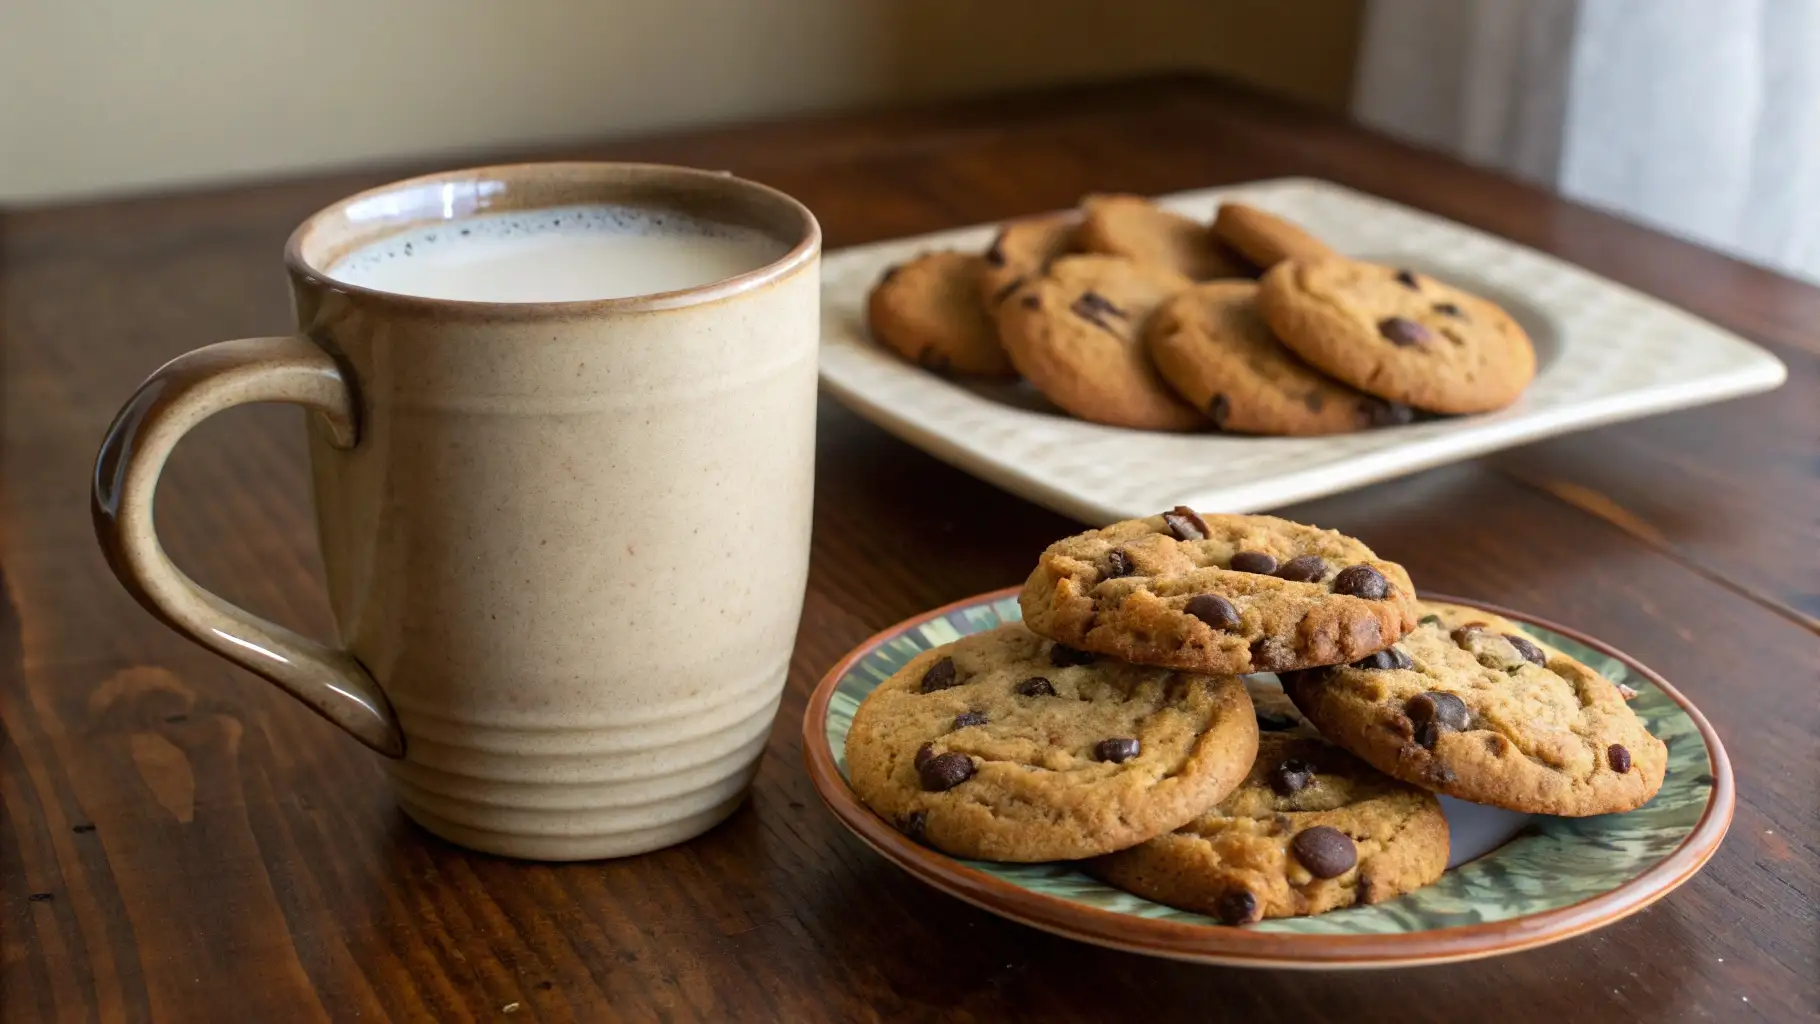
There’s something truly magical about the simple pairing of milk and cookies—it’s the ultimate comfort food that brings back childhood memories and satisfies your sweet tooth like nothing else. Whether you’re curling up on a cozy evening or looking for the perfect treat to share with loved ones, this classic duo never fails to deliver pure happiness. Homemade cookies, fresh out of the oven, perfectly paired with a glass of warm milk—could there be anything more indulgent? This recipe is all about bringing you that nostalgic feeling with just a few simple ingredients, making it a quick, easy, and irresistible snack that you can enjoy any time. Ready to dive in and create this sweet treat? Let’s get started!
Key Benefits of Milk and Cookies
When it comes to comfort food, few things can rival the classic pairing of milk and cookies. It’s more than just a snack; it’s a moment of pure bliss that can brighten even the toughest of days. Here’s why this simple treat has remained a timeless favorite:
Nostalgia and Comfort: Milk and cookies bring back those childhood memories of cozy afternoons or bedtime treats. The warm, gooey texture of freshly baked cookies paired with the creamy smoothness of milk is comforting, soothing, and downright satisfying.
Satisfies Your Sweet Tooth: If you’ve ever had a sudden craving for something sweet, milk and cookies are the perfect solution. The balance of sweetness from the cookies and the mild richness of milk perfectly complements each other, making it the ultimate sweet indulgence.
Simple and Quick: One of the best things about this pairing is its simplicity. Whether you’re looking for a quick snack or a dessert to end the night on a high note, milk and cookies come together effortlessly. You don’t need complex ingredients or fancy techniques—just a few basic pantry staples.
Versatility: Milk and cookies can easily be customized. Whether you’re in the mood for chocolate chip, oatmeal, or even sugar cookies, the possibilities are endless. Add some nuts, dried fruit, or a touch of sea salt for a unique twist.
Perfect for Any Occasion: This treat isn’t just for kids! Whether you’re hosting a casual get-together or simply unwinding after a long day, milk and cookies are always a hit. They’re also great for celebrating a special moment or as a sweet gift for someone you care about.
So, next time you’re looking for a snack that brings both joy and satisfaction, remember that milk and cookies are your go-to comfort food—easy to make, easy to enjoy, and guaranteed to leave you smiling. Ready to try making your own batch? Let’s move on to the ingredients!
Ingredients for Milk and Cookies
Now that we’ve covered why milk and cookies are such a classic treat, let’s gather everything we need to make this delicious snack come to life! Don’t worry—this recipe is super simple and uses ingredients you probably already have in your kitchen.
For the Cookies:
1 cup unsalted butter (softened)
1 cup granulated sugar
1 cup packed brown sugar (adds deep, rich flavor)
2 large eggs
1 teaspoon vanilla extract (this adds a lovely warm flavor)
3 cups all-purpose flour
1 teaspoon baking soda (ensures a nice rise and soft texture)
1/2 teaspoon salt (balances the sweetness)
2 cups chocolate chips (or your favorite mix-ins like chopped nuts or dried fruit)
For the Milk:
2 cups whole milk (for the creamiest texture, but feel free to substitute with almond milk or oat milk if you prefer)
A pinch of cinnamon (optional, but it adds a comforting warmth)
Pro Tip:
Ensure your butter is soft before mixing! This will ensure that your dough mixes evenly, resulting in perfectly chewy cookies. If you forget to leave it out, just microwave the butter for 10-15 seconds to soften it quickly.
Now that you have everything ready, we can move on to the fun part—baking these scrumptious cookies and pairing them with some warm milk! Ready to get started? Let’s go!
Instructions for Making Milk and Cookies
Let’s dive into making the perfect batch of milk and cookies! The process is easy, and before you know it, you’ll have a batch of warm, gooey cookies ready to pair with a glass of creamy milk. Follow these steps, and you’ll be savoring every bite!
Step 1: Preheat Your Oven
Start by preheating your oven to 350°F (175°C). This ensures the oven is hot enough to bake the cookies evenly and give them that perfect golden-brown color.
Step 2: Cream the Butter and Sugars
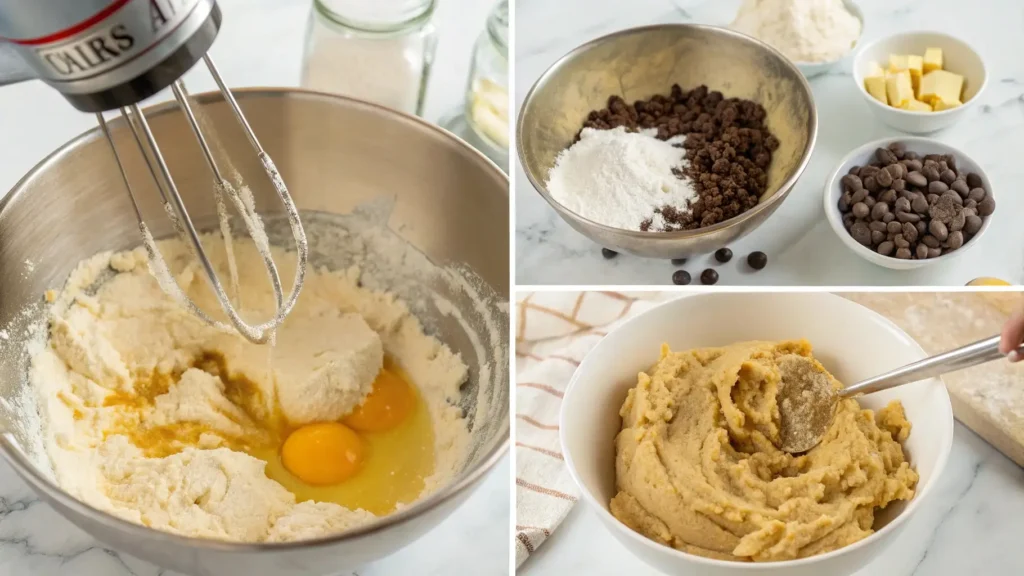
In a large mixing bowl, add the softened butter, granulated sugar, and brown sugar. Use an electric mixer or a whisk to beat them together until light and fluffy. This step is key to getting that deliciously tender texture in your cookies!
Step 3: Add the Eggs and Vanilla
Now, add the eggs, one at a time, and mix well after each addition. Then stir in the vanilla extract. This combination will give your cookies a wonderfully aromatic flavor.
Step 4: Mix the Dry Ingredients
Combine the flour, baking soda, and salt in a second bowl, whisking to evenly distribute. Add the dry ingredients to the wet mixture in batches, gently stirring until just incorporated. Be careful not to overmix, as this can make the cookies too dense.
Step 5: Fold in the Chocolate Chips
Next, fold in your chocolate chips (or other mix-ins like chopped nuts or dried fruit). This is the fun part—get those chocolate morsels evenly distributed throughout the dough!
Step 6: Scoop the Dough
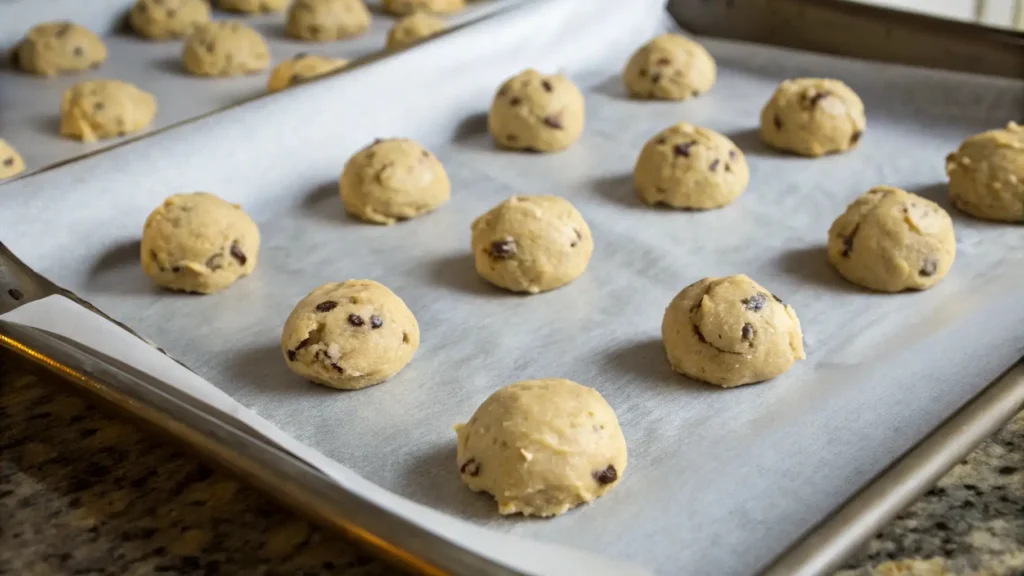
Using a cookie scoop or a tablespoon, drop generous portions of dough onto a baking sheet lined with parchment paper. Make sure the dough balls are spaced about 2 inches apart to allow room for the cookies to spread as they bake.
Step 7: Bake the Cookies
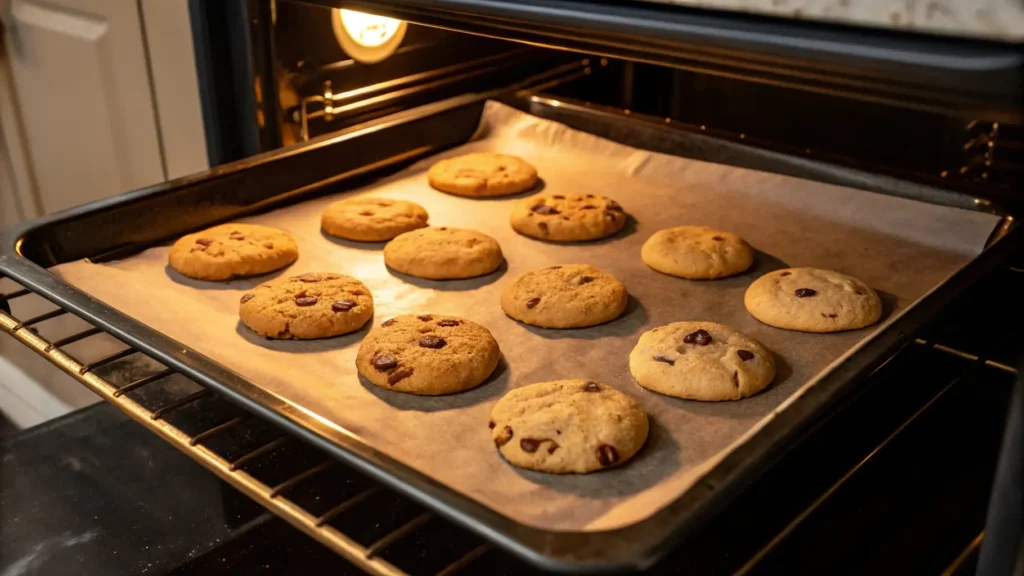
Place the baking sheet in the preheated oven and bake the cookies for 10-12 minutes, or until the edges are golden and the centers are set but still soft. If you prefer chewier cookies, underbake them by a minute or two and let them finish cooking on the sheet.
Step 8: Cool the Cookies
Let the cookies sit on the baking tray for a few minutes right after they come out of the oven. This will help them firm up. Allow the cookies to cool completely by setting them on a wire rack. While they cool, prepare your milk for the perfect dunking experience.
Step 9: Pair with Milk
For the best experience, heat your whole milk (or any milk of your choice) in a small saucepan or microwave until it’s warm but not boiling. To enhance the taste, sprinkle in a bit of cinnamon—it adds just the right touch of comfort.
Step 10: Enjoy!
Now comes the best part—dunking! Grab a cookie, dip it into the warm milk, and enjoy the perfect combination of crispy edges, chewy centers, and creamy milk. It’s pure bliss!
Pro Tip:
If you like extra chewy cookies, try refrigerating the dough for 30 minutes before baking. Chilled dough spreads less and results in a thicker, chewier cookie!
With these simple steps, you’ll have freshly baked cookies and a glass of milk ready in no time. Whether you’re sharing them with family or enjoying them solo, this treat is bound to bring a smile to your face. Happy baking!
Pro Tips and Variations for Milk and Cookies
Baking milk and cookies is a delightful process, but there are some pro tips and variations that can make your cookies even more amazing. Let’s take this treat to the next level with these easy-to-follow suggestions that will add a personal touch to your baking.
Pro Tips for Perfect Cookies:
Use Room Temperature Ingredients: Start with butter and eggs that are at room temperature. This helps them mix more easily and ensures a smoother, more consistent dough. The result? Perfectly chewy cookies, every single time.
Avoid overmixing the dough: Stir the dry ingredients into the wet mixture just until combined. If you overmix, the gluten will activate, causing your cookies to be dense instead of tender. The key is to keep it light and gentle!
Chill the dough for 30 minutes to ensure your cookies turn out thick and chewy. This will prevent the cookies from spreading too thin and help them maintain a fuller, rounder shape.
Quality Ingredients Matter: High-quality chocolate chips or chunks can elevate your cookies. Opt for a rich, dark chocolate or a blend of milk and dark chocolate for a deeper, more decadent flavor.
Delicious Variations:
Nutty Additions: For an extra crunch and a nutty twist, add a handful of chopped walnuts, pecans, or macadamia nuts. The contrast of texture adds a lovely surprise in every bite.
Fruit and Chocolate Combo: Add dried cranberries or raisins along with the chocolate chips for a sweet and tart combo. This variation pairs perfectly with the sweetness of the cookies, creating a balanced flavor profile.
Double Chocolate Delight: If you’re a chocolate lover, go for double chocolate cookies. Swap out a little of the flour for unsweetened cocoa powder to create a rich, chocolatey base. Add extra chocolate chips to the mix for that ultimate indulgence.
Salted Cookies: Sprinkle a touch of sea salt on top of the cookies before baking. This enhances the sweetness of the cookies while balancing the chocolate, creating a complex flavor that is oh-so-delicious.
Storing and Freezing Your Cookies:
Store at Room Temperature: Keep your cookies fresh by storing them in an airtight container at room temperature. They’ll stay soft for up to 1 week.
Freezing Dough for Later: Want to bake later? You can freeze the dough! Form the dough into balls, place them on a baking sheet, and freeze until solid. Afterward, move the dough balls into a freezer-safe bag. When you’re ready to bake, just pop them straight into the oven—no thawing needed. An extra minute or two in the oven might be necessary.
Reheating for Freshness: To restore the warm, fresh-from-the-oven experience, pop your cookies in the oven at 300°F for about 5 minutes. This will soften them up and bring back that just-baked texture.
These pro tips and variations allow you to make your milk and cookies even more personal and fun. Whether you stick with the classic recipe or experiment with new flavors, each batch will be a delicious treat that’s sure to impress! Enjoy the process and savor the results!
Serving Suggestions for Milk and Cookies
Once your milk and cookies are baked to perfection, it’s time to serve them up in style! Whether you’re enjoying a cozy night in or sharing a batch with friends, these simple serving ideas will make your treat even more delightful.
Classic Pairing: Milk and Cookies
There’s nothing quite like the classic pairing of warm cookies and cold milk. Serve your cookies with a glass of whole milk (or any milk of your choice), and enjoy the timeless, comforting combination. You can even heat the milk slightly for a cozy touch—just be careful not to let it boil.
Milkshake Twist
For a fun twist, turn your milk and cookies into a milkshake! Simply blend a few cookies with a scoop of vanilla ice cream and some milk for a thick, creamy treat that’s sure to impress. It’s a fun and indulgent way to enjoy your cookies in a new form.
Create a Dessert Platter
If you’re serving milk and cookies for a gathering or as part of a dessert table, create a beautiful platter with a variety of cookie types (think chocolate chip, oatmeal, sugar cookies, or even some vegan options). Pair each cookie with a small glass of milk or other beverages like coffee or hot chocolate for a treat that guests can personalize to their liking.
Cookie Dipping Station
Set up a cookie dipping station for an interactive dessert experience. Offer a variety of dipping sauces, such as chocolate sauce, caramel, or even fruit jams. Not only will this elevate your milk and cookies experience, but it adds an element of fun for guests of all ages!
Pair with Coffee or Tea
If you’re looking for a more sophisticated pairing, try serving your milk and cookies with a cup of coffee or tea. The rich flavor of a freshly brewed coffee or a soothing tea complements the sweetness of the cookies and makes for a wonderful afternoon treat.
Make a DIY Cookie Sandwich
Turn your cookies into a sandwich! Place a scoop of ice cream or whipped cream between two cookies to create a decadent cookie sandwich. For added flavor and texture, roll the edges in your choice of crushed nuts, sprinkles, or chocolate chips.
Pro Tip:
If you want to impress your guests or simply enjoy a treat on your own, serve your milk and cookies in an aesthetically pleasing way—think mason jars for the milk and a rustic cookie jar or tray for the cookies. Little details like these elevate the whole experience!
With these simple yet creative serving suggestions, you’ll be able to enjoy milk and cookies in a way that suits any occasion. Whether you’re keeping it classic or trying something new, there’s no wrong way to enjoy this timeless treat!
Conclusion
Milk and cookies are more than just a snack—they’re a nostalgic treat that brings warmth, comfort, and joy to any occasion. Whether you’re enjoying them on a quiet evening or sharing them with friends and family, this classic combination never fails to please. The simplicity of homemade cookies paired with a glass of milk is a timeless indulgence that’s always guaranteed to hit the spot.
Baking milk and cookies from scratch is a rewarding experience, and with these easy steps, pro tips, and variations, you can make your own personalized batch every time. From choosing the right ingredients to experimenting with fun mix-ins, there are endless possibilities to explore, ensuring each cookie is uniquely yours.
So next time you’re in the mood for something sweet, remember that the best things in life are often the simplest. Gather your ingredients, preheat that oven, and let the warm, sweet aroma of baking cookies fill your home. There’s no better way to enjoy the little moments than with a delicious batch of milk and cookies in hand.
Happy baking, and most importantly—enjoy every bite!
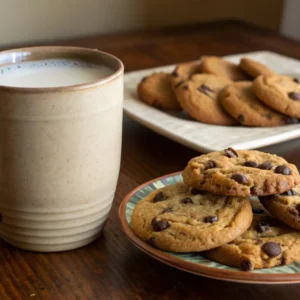
Milk and Cookies
Ingredients
For the Cookies:
- 1 cup unsalted butter softened
- 1 cup granulated sugar
- 1 cup packed brown sugar adds deep, rich flavor
- 2 large eggs
- 1 teaspoon vanilla extract this adds a lovely warm flavor
- 3 cups all-purpose flour
- 1 teaspoon baking soda ensures a nice rise and soft texture
- 1/2 teaspoon salt balances the sweetness
- 2 cups chocolate chips or your favorite mix-ins like chopped nuts or dried fruit
For the Milk:
- 2 cups whole milk for the creamiest texture, but feel free to substitute with almond milk or oat milk if you prefer
- A pinch of cinnamon optional, but it adds a comforting warmth
Pro Tip:
- Ensure your butter is soft before mixing! This will ensure that your dough mixes evenly resulting in perfectly chewy cookies. If you forget to leave it out, just microwave the butter for 10-15 seconds to soften it quickly.
Instructions
Step 1: Preheat Your Oven
- Start by preheating your oven to 350°F (175°C). This ensures the oven is hot enough to bake the cookies evenly and give them that perfect golden-brown color.
Step 2: Cream the Butter and Sugars
- In a large mixing bowl, add the softened butter, granulated sugar, and brown sugar. Use an electric mixer or a whisk to beat them together until light and fluffy. This step is key to getting that deliciously tender texture in your cookies!
Step 3: Add the Eggs and Vanilla
- Now, add the eggs, one at a time, and mix well after each addition. Then stir in the vanilla extract. This combination will give your cookies a wonderfully aromatic flavor.
Step 4: Mix the Dry Ingredients
- Combine the flour, baking soda, and salt in a second bowl, whisking to evenly distribute. Add the dry ingredients to the wet mixture in batches, gently stirring until just incorporated. Be careful not to overmix, as this can make the cookies too dense.
Step 5: Fold in the Chocolate Chips
- Next, fold in your chocolate chips (or other mix-ins like chopped nuts or dried fruit). This is the fun part—get those chocolate morsels evenly distributed throughout the dough!
Step 6: Scoop the Dough
- Using a cookie scoop or a tablespoon, drop generous portions of dough onto a baking sheet lined with parchment paper. Make sure the dough balls are spaced about 2 inches apart to allow room for the cookies to spread as they bake.
Step 7: Bake the Cookies
- Place the baking sheet in the preheated oven and bake the cookies for 10-12 minutes, or until the edges are golden and the centers are set but still soft. If you prefer chewier cookies, underbake them by a minute or two and let them finish cooking on the sheet.
Step 8: Cool the Cookies
- Let the cookies sit on the baking tray for a few minutes right after they come out of the oven. This will help them firm up. Allow the cookies to cool completely by setting them on a wire rack. While they cool, prepare your milk for the perfect dunking experience.
Step 9: Pair with Milk
- For the best experience, heat your whole milk (or any milk of your choice) in a small saucepan or microwave until it’s warm but not boiling. To enhance the taste, sprinkle in a bit of cinnamon—it adds just the right touch of comfort.
Step 10: Enjoy!
- Now comes the best part—dunking! Grab a cookie, dip it into the warm milk, and enjoy the perfect combination of crispy edges, chewy centers, and creamy milk. It’s pure bliss!
Pro Tip:
- If you like extra chewy cookies, try refrigerating the dough for 30 minutes before baking. Chilled dough spreads less and results in a thicker, chewier cookie!
Notes
- Calories: 200 kcal
- Fat: 10g
- Saturated Fat: 6g
- Trans Fat: 0g
- Cholesterol: 25mg
- Sodium: 150mg
- Carbohydrates: 30g
- Fiber: 1g
- Sugar: 20g
- Protein: 2g
- Vitamin A: 4% of the Daily Value
- Calcium: 2% of the Daily Value
- Iron: 4% of the Daily Value
FAQs for Milk and Cookies
Here are some of the most common questions about making the perfect milk and cookies. If you’re wondering about certain steps, substitutions, or storing your cookies, you’ve come to the right place!
1. Can I make the dough ahead of time?
Yes! In fact, you can make your cookie dough ahead of time and store it in the fridge for up to 3 days. Chilling the dough also helps the flavors meld together and gives you thicker, chewier cookies. If you want to freeze it, simply scoop the dough into balls and freeze them on a baking sheet. Once they’re solid, transfer them to a freezer-safe bag. When you’re ready to bake, just pop them directly in the oven (no need to thaw!)—just add an extra minute or two to the baking time.
2. Can I substitute the butter for something else?
If you need a dairy-free or vegan option, you can substitute the butter with margarine or a plant-based butter alternative. For a healthier option, you could also use coconut oil, though keep in mind it will add a slight coconut flavor to the cookies. Just make sure to use the same amount as the recipe calls for.
3. How do I store leftover cookies?
To keep your milk and cookies fresh, store them in an airtight container at room temperature for up to 1 week. This will keep them soft and chewy. If you prefer your cookies crisp, you can store them in a container without sealing the lid tightly.
4. Can I freeze the baked cookies?
Absolutely! Once your cookies are baked and completely cooled, you can freeze them in an airtight container or freezer-safe bag. Layer parchment paper between the cookies to prevent them from sticking together. When you’re ready to enjoy them, simply let them thaw at room temperature for a few hours, or warm them up in the oven at 300°F for about 5 minutes.
5. How can I make my cookies more chewy?
For extra chewy cookies, make sure to:
Underbake slightly: Remove the cookies from the oven when they’re just slightly golden around the edges.
Chill the dough: Chilled dough prevents excessive spreading and results in thicker cookies.
Use more brown sugar: Brown sugar contains molasses, which contributes to a softer, chewier texture compared to white sugar.
6. What kind of milk is best for dunking?
While whole milk is the classic choice for dunking, you can use whatever you prefer! Almond milk, oat milk, or soy milk are all great dairy-free alternatives. If you like your milk extra creamy, go for half-and-half or even a splash of heavy cream.
7. How do I know when the cookies are done baking?
The key to perfect cookies is watching the edges. Milk and cookies are ready when the edges are golden brown, but the center still looks a bit soft. They will continue to firm up as they cool on the baking sheet, so don’t worry if they appear slightly underdone.
8. Can I add other mix-ins to the dough?
Definitely! Some popular mix-ins include:
Nuts like walnuts, pecans, or macadamia nuts
Dried fruit such as cranberries or raisins
Toffee bits for a sweet, buttery crunch
Peanut butter or white chocolate chips for a new twist
Pro Tip:
Don’t be afraid to experiment with different combinations! The beauty of making milk and cookies is that you can customize the flavor to suit your taste. If you’re feeling creative, try adding a pinch of cinnamon to the dough for a warm, spiced kick.

